fbpx

Why Your Copper Pipes Are Turning Green

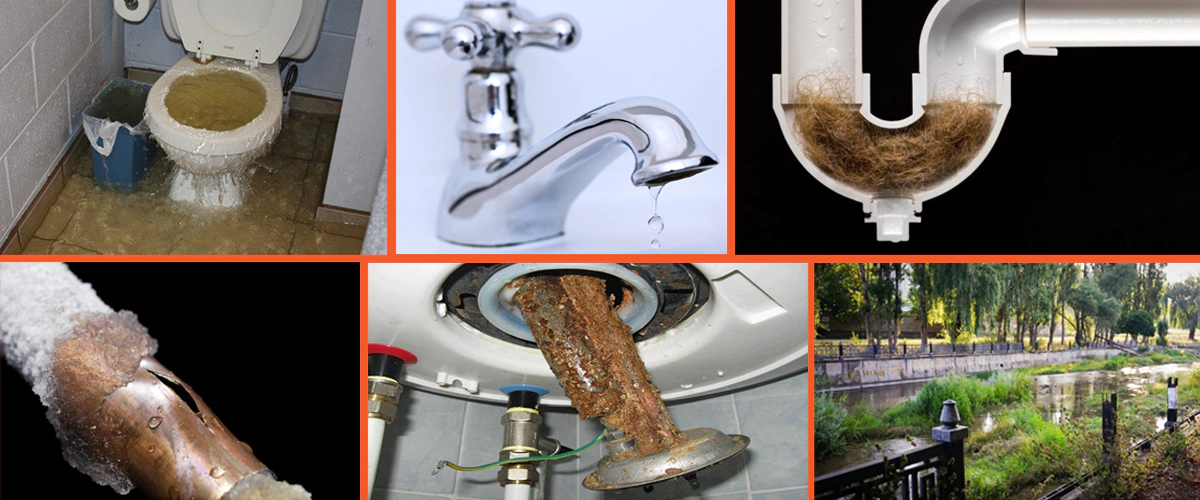
Copper pipes turning green can be a perplexing issue for homeowners. In this article, we’ll delve into the reasons behind this phenomenon, its potential impact on water quality, preventive measures, and both DIY and professional solutions.

Causes of Copper Pipe Discoloration

Copper pipes may undergo discoloration due to chemical reactions with water, corrosion, and environmental factors. Understanding these causes is crucial for addressing the issue effectively.

Copper pipe discoloration is a common issue that homeowners may encounter, and understanding the causes behind this phenomenon is crucial for effective resolution. The following factors contribute to the discoloration of copper pipes:

1. Chemical Reactions with Water

One primary cause of copper pipe discoloration is the result of chemical reactions with water. The presence of certain minerals and substances in water can lead to a reaction with the copper, causing it to develop a greenish tint. Factors such as high mineral content, acidity, or alkalinity of the water can play a role in this reaction.

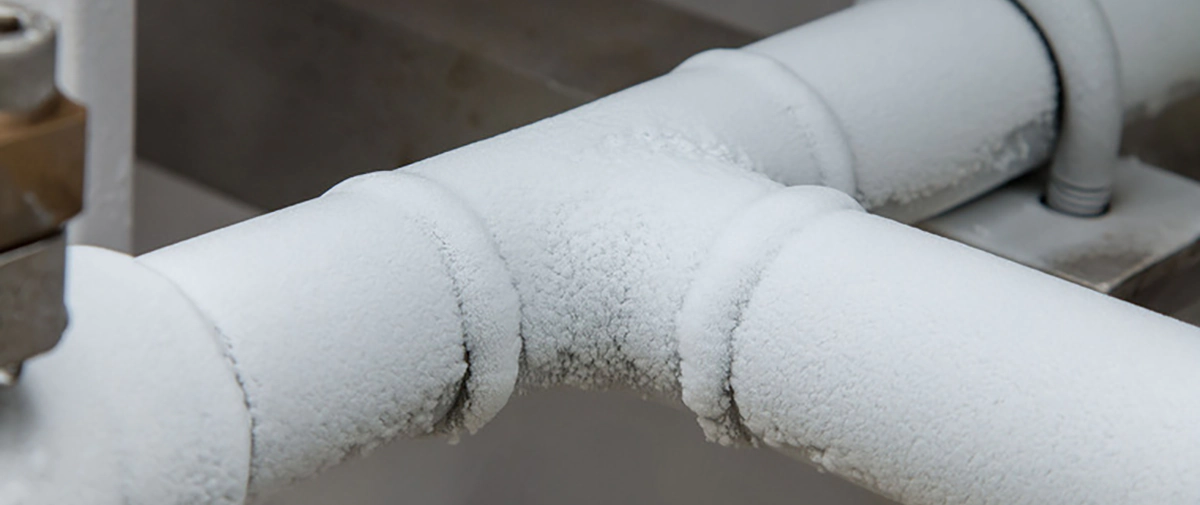
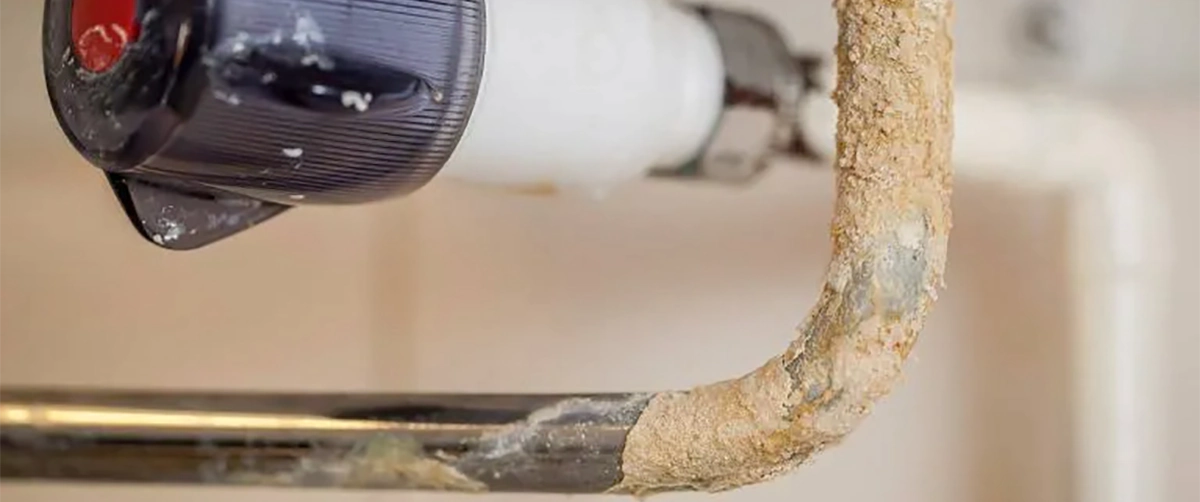
2. Corrosion and Oxidation

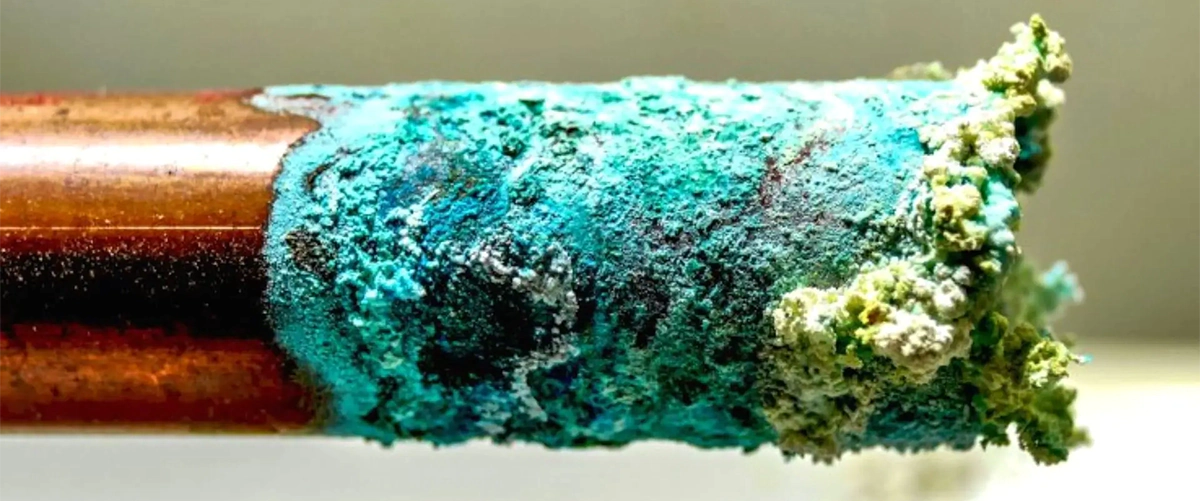
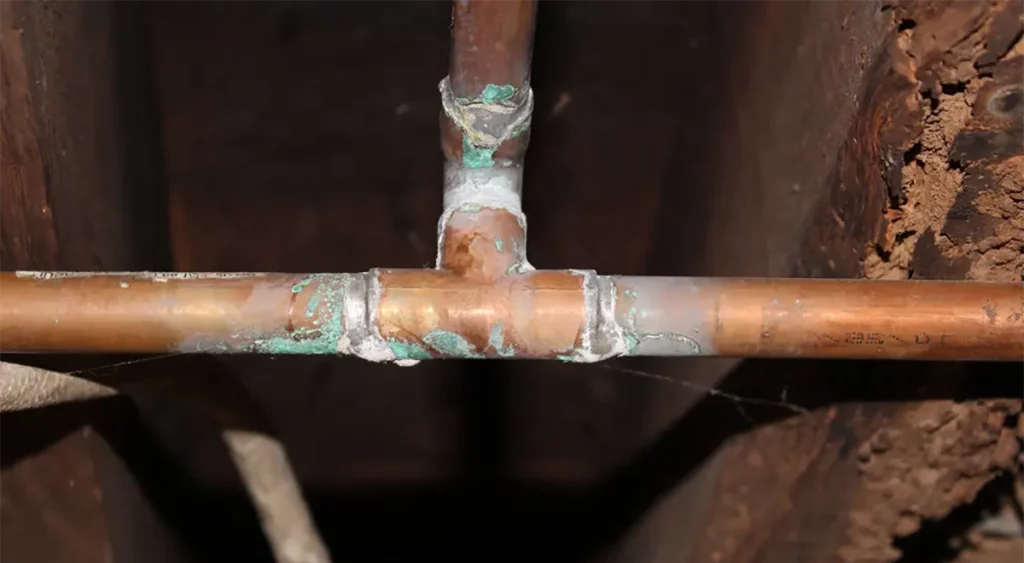
Corrosion is another significant factor contributing to the discoloration of copper pipes. When copper comes into contact with oxygen and moisture over time, it undergoes oxidation. This process forms copper oxide, commonly known as tarnish, resulting in a greenish or bluish hue on the surface of the pipes.

3. Environmental Factors

External environmental conditions can also impact the appearance of copper pipes. Exposure to elements like air pollution, humidity, and certain chemicals in the surroundings can accelerate the tarnishing process. In areas with high humidity or industrial activities, copper pipes may be more prone to discoloration.

Impact on Water Quality

The green tint in copper pipes might raise concerns about water quality. We’ll explore the potential health implications and effects on plumbing systems associated with this discoloration.

The greenish tint that copper pipes sometimes develop can raise concerns about water quality in residential plumbing systems. Understanding the potential impact is essential for homeowners to address the issue effectively.

  • Health Concerns

While the green colour itself may not pose an immediate health risk, it can be an indicator of underlying problems. Copper pipe discoloration is often associated with corrosion or oxidation, which may lead to the release of copper particles into the water. Elevated levels of copper in drinking water can have health implications, including nausea, vomiting, and gastrointestinal discomfort.

It’s crucial to note that the severity of health concerns depends on the concentration of copper and individual sensitivity. Regular water testing can help determine if copper levels exceed recommended limits, allowing homeowners to take appropriate actions to safeguard their health.

  • Effects on Plumbing Systems

Apart from health considerations, copper pipe discoloration can have adverse effects on the plumbing infrastructure. Corrosion and oxidation compromise the structural integrity of the pipes, potentially leading to leaks and reduced water flow. In severe cases, untreated copper pipe issues may result in the need for extensive repairs or even complete replacements.

Homeowners should be vigilant about any changes in water colour and quality. If copper pipe discoloration is detected, seeking professional evaluation and intervention is advisable. Prompt action can prevent further deterioration of water quality and ensure the longevity of the plumbing system.

Preventative measures to prevent copper pipes from turning green

Proactively addressing copper pipe discoloration involves measures like water quality testing, maintaining pH levels, and installing protective coatings. These actions can prevent the issue from arising in the first place.

  • Water Quality Testing

Regular water quality testing is crucial in preventing copper pipe discoloration. Understanding the mineral content, pH levels, and any impurities in the water can help identify potential causes of corrosion. Homeowners can conduct periodic water tests or enlist the services of professionals to ensure water quality compliance.

  • pH Level Maintenance

The acidity or alkalinity of water, as measured by its pH level, plays a significant role in copper corrosion. Maintaining a balanced pH level can mitigate the risk of discoloration. Using water treatment systems or additives to regulate the pH can be an effective preventative measure.

  • Installation of Protective Coatings

Applying protective coatings on copper pipes is a proactive way to shield them from external elements. Coatings act as a barrier, preventing direct contact between the copper surface and environmental factors like air, moisture, and pollutants. This can significantly reduce the likelihood of oxidation and discoloration.

  • Regular Maintenance Practices

Implementing a routine maintenance schedule for plumbing systems is essential. Inspecting pipes for any signs of corrosion, leaks, or discoloration allows homeowners to address issues at their early stages. Cleaning copper pipes with mild solutions and soft brushes during maintenance can help maintain their appearance.

  • Environmental Considerations

Taking environmental factors into account is key in preventing copper pipe discoloration. Avoid exposing copper pipes to harsh conditions, such as industrial pollutants or excessive humidity. Protective measures like installing insulation can safeguard pipes from adverse environmental effects.

DIY Solutions for Copper Pipe Discoloration

Copper pipes turning green can be a common issue, but homeowners can take proactive steps to address and prevent discoloration with simple do-it-yourself (DIY) solutions. Here are effective DIY measures to maintain the integrity of your copper plumbing:

Natural Cleaning Agents

Lemon and Salt Paste:

  • Create a mixture of lemon juice and salt to form a paste. Apply it to the affected areas of the copper pipes, gently scrubbing with a soft cloth. The acidity of the lemon helps dissolve tarnish, restoring the copper’s shine.

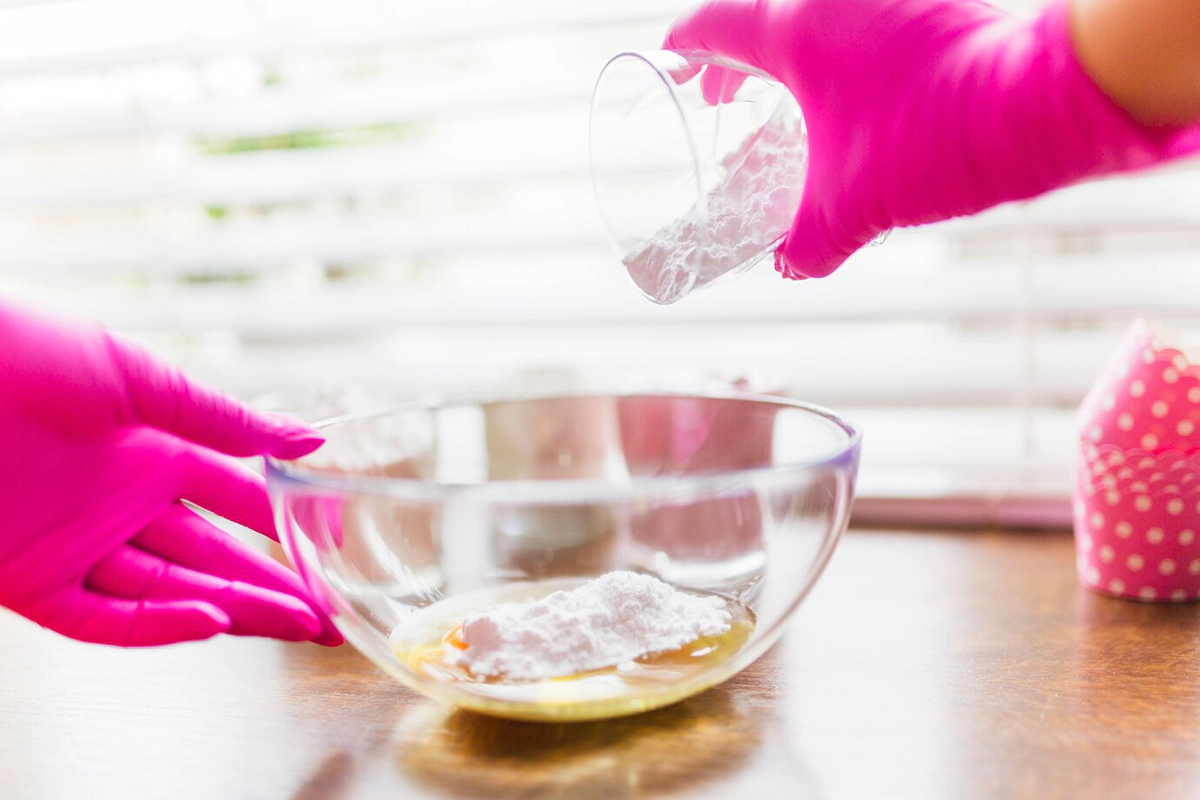
Vinegar and Baking Soda Solution:

  • Mix equal parts vinegar and baking soda to form a cleaning solution. Apply it to the discoloured areas, allowing the mixture to sit for a few minutes. Scrub with a non-abrasive brush or cloth, then rinse thoroughly.

Regular Maintenance Practices

Soft Brushes and Mild Detergents:

  • Incorporate soft brushes and mild, non-abrasive detergents into your regular maintenance routine. Periodically clean copper pipes with these gentle solutions to prevent the build-up of tarnish.

Microfiber Cloths:

  • Use microfiber cloths for regular cleaning to avoid scratching the surface of copper pipes. These clothes are effective in removing dust and preventing the onset of discoloration.

Protective Measures

Beeswax Coating:

  • Apply a thin layer of beeswax to copper pipes to create a protective barrier against environmental elements. This natural coating helps prevent oxidation and slows down the tarnishing process.

Olive Oil Polish:

  • For a natural sheen, apply a small amount of olive oil to a soft cloth and gently rub it onto the copper surface. This not only enhances the appearance but also adds a layer of protection.

Environmental Awareness

Avoid Harsh Cleaning Products:

  • Steer clear of abrasive cleaning products that may accelerate copper tarnishing. Opt for mild and eco-friendly alternatives to maintain the health of your plumbing system.

Protect Pipes from Moisture:

  • Address any leaks promptly and insulate copper pipes to protect them from excessive moisture. Moist conditions can expedite the oxidation process, leading to discoloration.

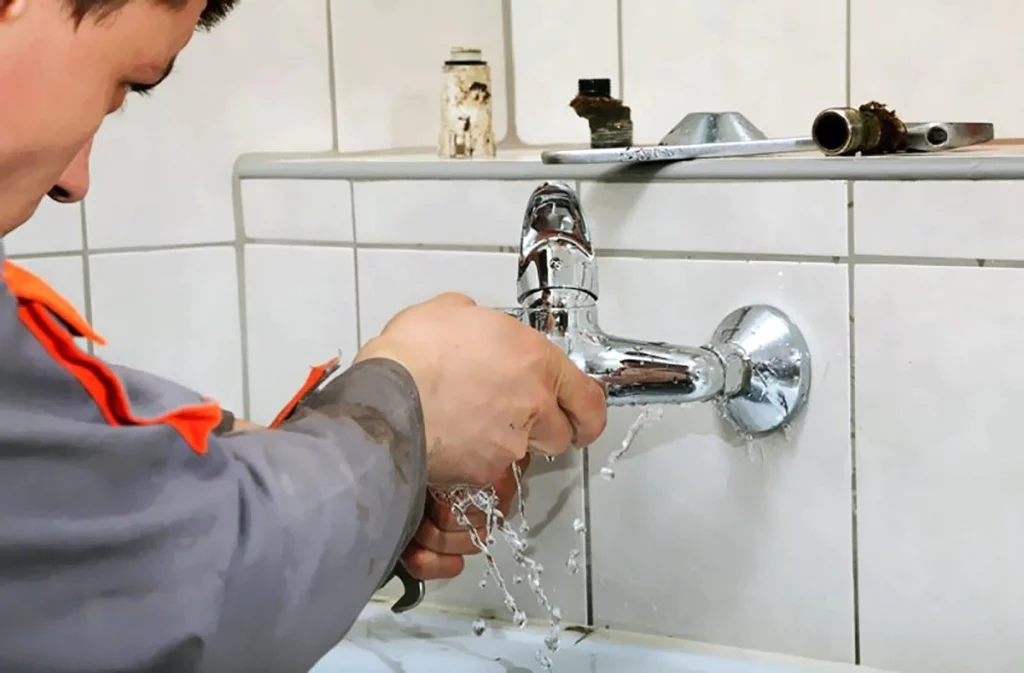
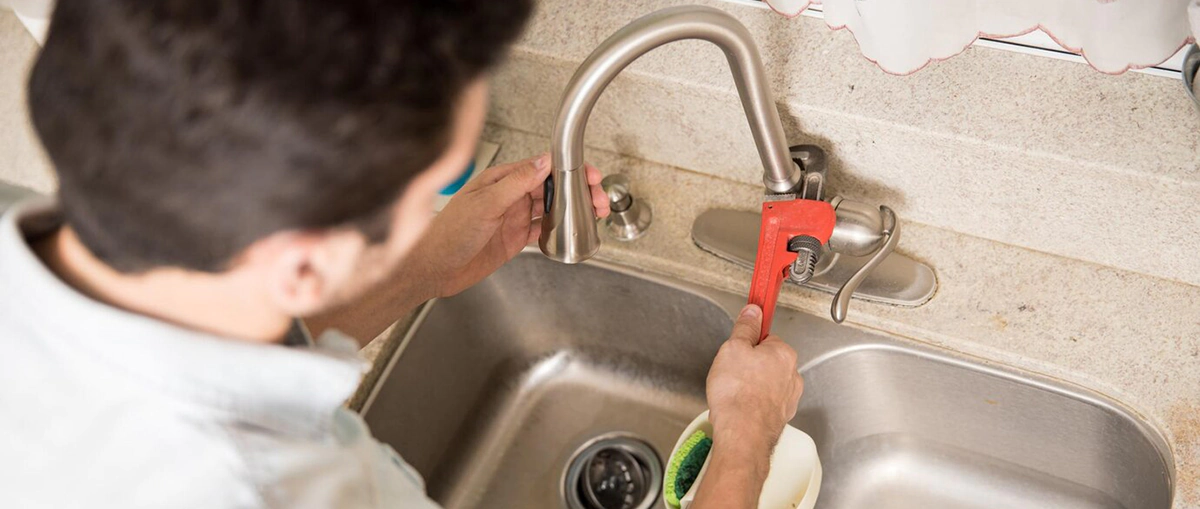
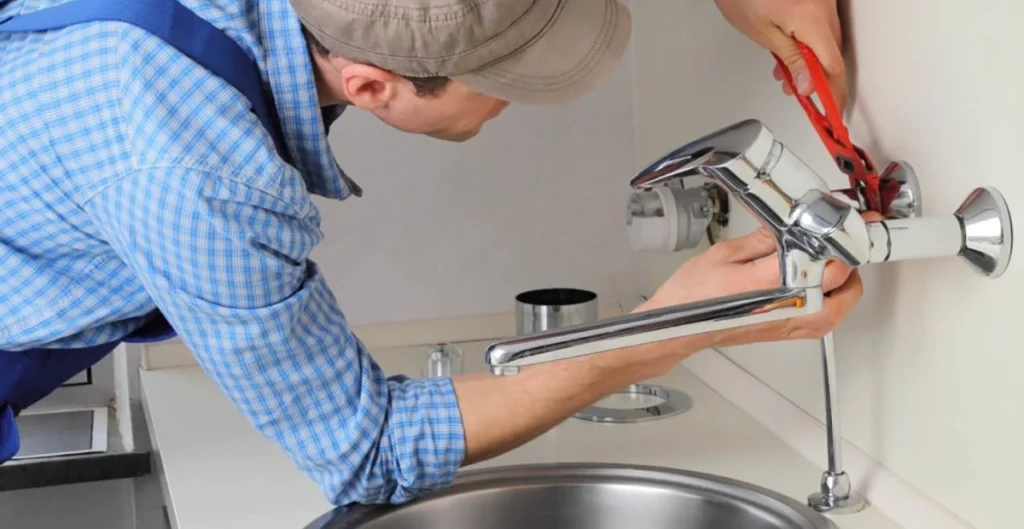
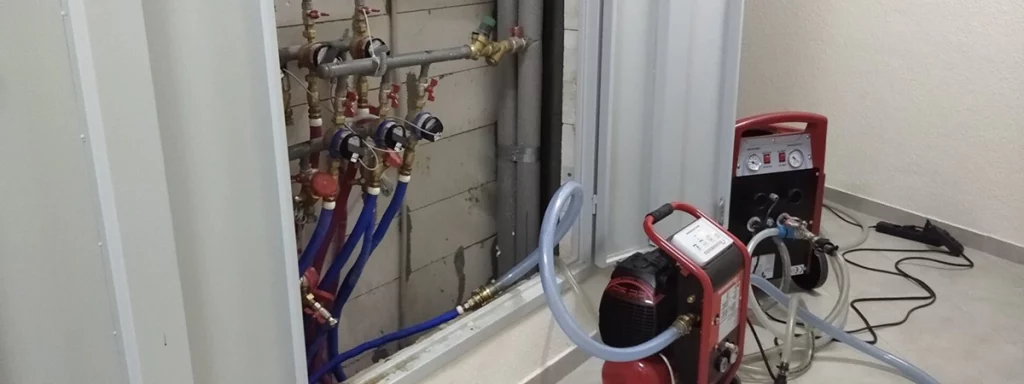
Professional Assistance for Copper Pipe Discoloration

While DIY solutions are valuable for maintaining copper pipes, certain situations may require the expertise of professionals. Seeking professional assistance is crucial for accurate diagnosis and effective resolution of copper pipe discoloration. Here’s what homeowners should consider:

Importance of Expert Evaluation

Professional Inspection:

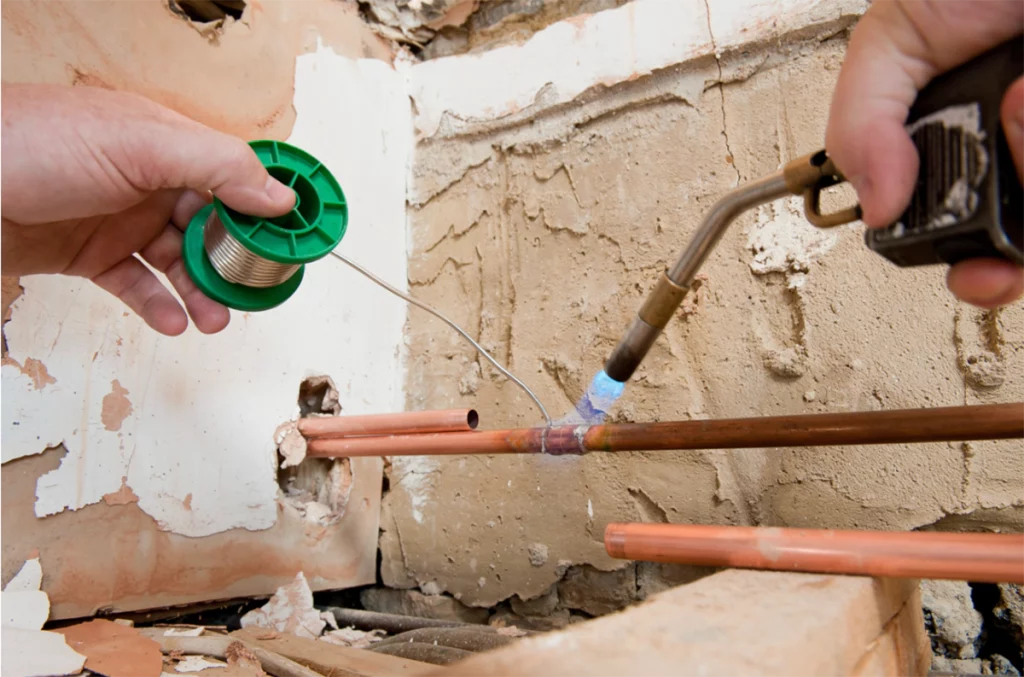
  • Engage the services of a qualified plumber or plumbing professional for a comprehensive inspection of your copper plumbing system. Professionals can identify the root cause of discoloration, whether it be corrosion, oxidation, or other factors.

Water Quality Testing:

  • Professionals can conduct thorough water quality testing to determine if any impurities or high mineral content is contributing to copper pipe discoloration. This precise analysis aids in formulating targeted solutions.

Copper Pipe Restoration Services

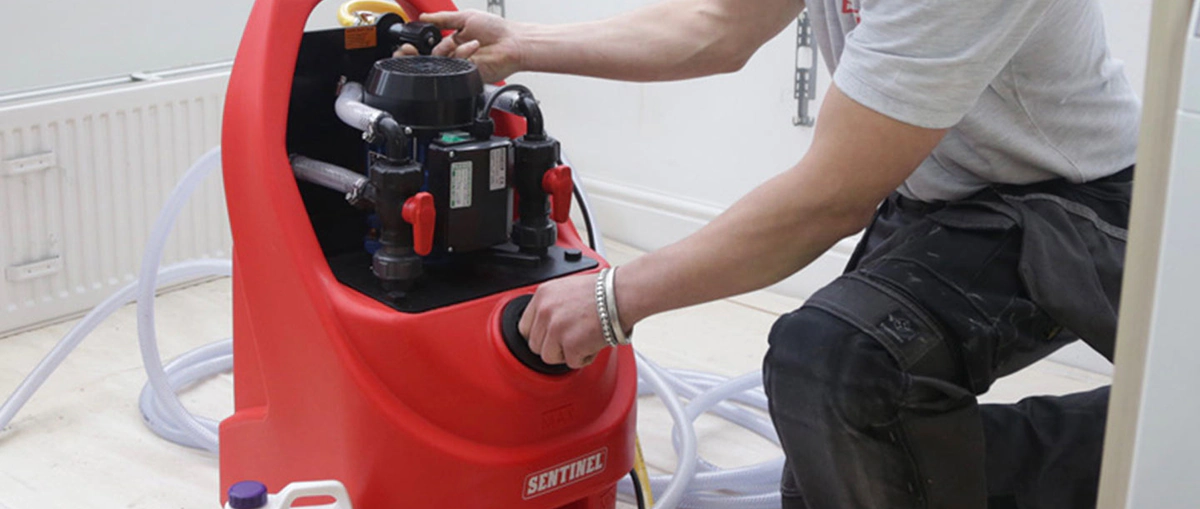
Advanced Cleaning Techniques:

  • Professional plumbers have access to advanced cleaning techniques that go beyond DIY solutions. They may use specialised equipment and solutions to restore the original appearance of copper pipes effectively.

Surface Protection Coatings:

  • Plumbing professionals can apply professional-grade protective coatings to copper pipes, providing a durable shield against environmental factors. This preventive measure helps to prolong the life of the pipes and prevent future discoloration.

In conclusion, understanding why copper pipes turn green is the first step towards effective resolution. Whether through preventive measures, DIY solutions, or professional assistance, addressing this issue is crucial for maintaining a healthy plumbing system.

FAQs

How can I prevent my copper pipes from turning green?

Regular maintenance, water quality testing, and pH level monitoring can prevent copper pipe discoloration.

Are green copper pipes harmful to health?

While the green colour itself is not harmful, it may indicate corrosion, potentially affecting water quality. Professional evaluation is recommended.

Can I use DIY solutions to clean green copper pipes?

Yes, using natural cleaning agents and regular maintenance practices can be effective DIY solutions.

What are the cost implications of addressing green copper pipes?

Costs vary depending on the extent of the issue. Repair costs may be lower than complete replacement, but long-term investment in quality materials is advisable.

How can I contribute to environmental sustainability in dealing with copper pipes?

Consider recycling and repurposing copper pipes, and stay informed about sustainable plumbing practices.

8 Common Springtime Plumbing Emergencies and How to Avoid Them

Plumbing problems have a knack for making their presence felt at the most inconvenient times. As spring rolls around, many homeowners find themselves grappling with a variety of plumbing emergencies. In this article, we’ll explore eight common springtime plumbing issues, offering insights on how to identify, prevent, and address them effectively.

As flowers bloom and temperatures rise, the thawing process can reveal hidden plumbing challenges. It’s crucial for homeowners to be proactive in safeguarding their plumbing systems to avoid disruptions during the vibrant spring season.

Leaky Faucets: A Drip Too Many

A persistent drip from a faucet may seem minor, but it can lead to significant water wastage and potential damage. Inspecting and repairing leaky faucets promptly can save water and prevent costly repairs.

  • Causes of Leaky Faucets

Understanding the root causes is the first step towards addressing this common problem. Often, a worn-out washer, damaged O-ring, or a corroded valve seat can be the culprits behind that persistent drip. Identifying these components and inspecting them regularly can save you from a cascade of plumbing troubles.

  • Prevention is Key

The best way to deal with a leaky faucet is to prevent it in the first place. Regular maintenance is crucial – replace worn-out parts promptly, and don’t underestimate the power of a simple tightening. Ignoring a leak not only wastes water but can lead to more severe issues, including water damage and mould growth.

  • DIY Fixes for the Drip

For the avid DIY enthusiast, fixing a leaky faucet can be a satisfying project. With the right tools and a bit of know-how, replacing a washer or O-ring is a manageable task. However, always ensure you turn off the water supply before embarking on any repairs. If in doubt, consulting online tutorials or seeking advice from your local hardware store can guide you through the process.

  • When to Call in the Professionals

While a leaky faucet can often be a DIY fix, there are instances where professional intervention is necessary. If you’re facing a complex mechanism or multiple leaks throughout your home, it might be time to call in a plumber. Their expertise ensures a comprehensive assessment and resolution, saving you time and potential frustration.

  • The Environmental Impact

Beyond the inconvenience and potential damage to your home, a leaky faucet contributes to water wastage. In a world where water conservation is increasingly crucial, addressing leaks promptly is not just about saving money – it’s a small but meaningful contribution to preserving our precious resources.

Clogged Drains: The Silent Menace

Clogged drains are notorious for causing inconvenience. Understanding the causes, such as hair and debris buildup, and adopting regular maintenance practices can keep drains flowing freely. 

1. Identifying Causes

Understanding the causes of clogged drains is the first step in prevention. Hair, soap scum, grease, and foreign objects are common culprits. Regularly clearing debris from sink and shower drains can prevent build-up and keep water flowing smoothly.

2. Simple Maintenance Tips

Preventing clogged drains doesn’t always require a plumber’s expertise. Implementing simple maintenance practices can go a long way. Invest in drain covers to catch hair and larger debris, and consider using a mixture of baking soda and vinegar periodically to break down potential clogs.

3. The Importance of Prompt Action

A slow-draining sink or standing water in your shower may seem like minor annoyances, but they are early warning signs of a potential clog. Ignoring these signals can lead to more severe issues, such as complete blockages and pipe damage. Addressing the problem promptly can save you from a plumbing disaster.

4. DIY Unblockers and Their Limitations

Supermarkets offer an array of drain unblocking solutions, from chemical cleaners to handy plungers. While these can be effective for minor clogs, they may not address more stubborn blockages deeper in the pipes. Exercise caution with chemical cleaners, as they can damage pipes over time.

5. Seeking Professional Assistance

When home remedies fall short, it’s time to call in the professionals. Plumbers have the tools and expertise to tackle even the most stubborn clogs. Hydro-jetting and drain snakes can clear blockages efficiently, restoring your plumbing system to optimal function.

6. The Cost of Ignoring Clogs

A seemingly minor clog, if left untreated, can result in water damage and expensive repairs. Additionally, clogs can lead to unpleasant odours and attract pests. Tackling clogs head-on not only preserves your plumbing but also maintains a hygienic and comfortable living environment.

Water Heater Woes: Chilling Showers Await

Nobody enjoys a cold shower unexpectedly. Learn to recognize signs of water heater issues and follow simple maintenance steps to ensure a constant supply of hot water.

Signs of Water Heater Issues

  • Inconsistent Temperature: If your once reliable water heater is delivering water at inconsistent temperatures, it’s a red flag. Fluctuating between scalding and frigid water indicates a problem that needs attention.
  • Strange Noises: Unusual sounds emanating from your water heater, such as popping or banging, could signify sediment build-up. This sediment can compromise heating efficiency and lead to malfunction.
  • Rusty Water: Brown or rusty water coming from your taps is a clear indication that your water heater might be corroding from the inside. This not only affects water quality but also the heater’s longevity.
  • Leaks: Any visible leaks around the base of your water heater demand immediate attention. Leaks can lead to significant water damage and, if left unchecked, may result in the need for a new heater altogether.

Maintenance Steps for Water Heater Longevity

  • Flush the Tank: Regularly flushing your water heater tank helps remove sediment that can hinder its efficiency. This simple maintenance task can extend the life of your heater and ensure optimal performance.
  • Check the Anode Rod: The sacrificial anode rod within your water heater prevents corrosion. Periodically checking and replacing this rod can protect your heater from the damaging effects of rust.
  • Set the Right Temperature: Adjusting your water heater to a reasonable temperature not only prevents scalding but also reduces wear and tear on the heating elements.
  • Insulate Your Tank: Insulating your water heater tank and pipes helps conserve heat, making your system more energy-efficient. This step is particularly important in colder climates.

Knowing When It’s Time to Replace

Despite diligent maintenance, water heaters have a finite lifespan. If your heater is over a decade old and showing signs of deterioration, it might be more cost-effective to replace it. Modern, energy-efficient models can offer improved performance and lower utility bills.

Professional Intervention

While some maintenance tasks can be performed by homeowners, it’s advisable to seek professional help for more complex issues. Certified plumbers can assess the health of your water heater, diagnose problems accurately, and provide the necessary repairs or replacements.

Burst Pipes: The Cold Culprit

Spring can bring unexpected cold snaps. Know the signs of burst pipes and take precautions to avoid the havoc that freezing temperatures can wreak on your plumbing.

Recognizing Signs of Burst Pipes

  • Water Stains or Discoloration: Stains on walls or ceilings, or changes in water colour, can indicate a hidden burst pipe. Pay attention to any unexplained marks around your home.
  • Reduced Water Pressure: A sudden drop in water pressure throughout your house may signify a burst pipe. Check multiple faucets to identify if the issue is widespread.
  • Strange Sounds: Unusual sounds, such as banging or clanging, coming from your pipes could indicate the stress caused by a burst. Be attentive to any sounds that seem out of the ordinary.
  • Visible Leaks or Water Pooling: If you notice water pooling in unusual areas or discover visible leaks, it’s crucial to investigate promptly. Ignoring these signs can lead to significant water damage.

The Cold Culprit: Freezing Temperatures

Burst pipes are often a consequence of freezing temperatures. When water inside pipes freezes, it expands, exerting immense pressure on the pipe walls. Eventually, this pressure can lead to cracks or ruptures, resulting in a burst pipe when the ice thaws.

Sump Pump Blues: Spring Showers Bring Basement Woes

Heavy spring rains can lead to basement flooding. Ensure your sump pump is in top condition to prevent water damage and the headaches that come with it.

Sprinkler System Surprises: The Garden Gusher

A malfunctioning sprinkler system can turn your garden into a swamp. Stay ahead by inspecting and maintaining your sprinkler system before it causes a watery disaster.

Getting Ahead of Sprinkler System Issues

  • Inspect Regularly: Regular inspection of your sprinkler system is paramount. Look for damaged or misaligned sprinkler heads, leaky pipes, and any signs of wear and tear.
  • Check Water Pressure: Excessive water pressure can lead to sprinkler malfunctions, resulting in uneven watering and potential gushers. Use a pressure gauge to ensure your system operates within the recommended range.
  • Clean Sprinkler Heads: Over time, dirt and debris can accumulate on sprinkler heads, affecting their performance. Regularly clean the heads to maintain proper water distribution.
  • Adjust Sprinkler Patterns: Ensure that your sprinkler system is configured to water your garden and lawn efficiently. Adjust the spray patterns to avoid overspray onto sidewalks, driveways, or other non-target areas.

Toilet Troubles: A Common Commode Crisis

Toilets can act up for various reasons. Understand common issues like running toilets and slow flushing, and take preventive measures to keep your bathroom plumbing in check.

Common Toilet Issues

  • Running Toilets: The persistent sound of water running even after flushing is a classic sign of a running toilet. This not only wastes water but can also significantly impact your water bills.
  • Clogs and Slow Flushing: Clogs and slow flushing are everyday toilet woes. They can be caused by a build-up of toilet paper, sanitary products, or foreign objects. Ignoring these issues can lead to more severe blockages.
  • Phantom Flushes: A toilet that flushes on its own, seemingly without reason, is experiencing phantom flushes. This can be caused by a faulty flapper valve that allows water to escape slowly.
  • Leaky Seals: The seals in your toilet can deteriorate over time, leading to leaks around the base. This not only causes water damage but also fosters the growth of unpleasant odours.

Prevention and DIY Fixes

  • Regular Maintenance: Perform routine checks on your toilet, including inspecting for leaks, ensuring proper flushing, and checking for any unusual sounds. Early detection can prevent minor issues from turning into major problems.
  • Use Toilet-Friendly Paper: Choose toilet paper that is septic-safe and breaks down easily. Avoid flushing items like wipes or sanitary products, as they can lead to stubborn clogs.
  • Adjust the Chain and Flapper: If your toilet is running continuously, adjusting the chain and ensuring the flapper seals properly can often resolve the issue. These are simple DIY fixes that can save water and restore your toilet’s efficiency.
  • Addressing Clogs: Use a plunger or a plumbing snake to address minor clogs. For persistent blockages, consider using a toilet auger or seeking professional assistance.

Professional Help: When to Call in the Experts

While DIY maintenance is valuable, know when it’s time to call in a professional plumber. Timely intervention can prevent minor issues from turning into major headaches.

Signs It’s Time to Consult a Professional

  1. Persistent Plumbing Issues: If you find yourself dealing with recurring plumbing problems, it’s a clear signal to seek professional help. Plumbers have the experience to identify the root cause and implement lasting solutions.
  2. Electrical Complications: Electrical issues pose a significant risk to both property and personal safety. If you’re experiencing frequent power outages, sparks, or other electrical anomalies, it’s time to call an electrician.
  3. Structural Damage: Cracks in walls, ceilings, or the foundation of your home may indicate structural issues. Professionals, such as structural engineers, can assess the damage and recommend appropriate solutions.
  4. Heating and Cooling Dilemmas: Inefficient or malfunctioning heating, ventilation, and air conditioning (HVAC) systems can impact your comfort and energy bills. HVAC professionals can diagnose and repair issues to ensure optimal performance.

Benefits of Seeking Professional Assistance

AspectBenefits
Expertise and ExperienceProfessionals bring in-depth knowledge and hands-on experience to accurately diagnose and efficiently resolve issues.
Safety AssuranceTrained professionals handle tasks involving electricity, plumbing, or structural elements safely, minimising risks to property and individuals.
Long-Term SolutionsProfessionals provide lasting solutions, preventing recurring issues and offering peace of mind that problems are thoroughly resolved.
Time and Cost EfficiencyProfessional intervention saves time and money, with efficient problem-solving skills and access to the right tools for prompt and effective resolutions.

When Not to Delay

Certain situations demand immediate professional attention:

  • Gas Leaks: If you suspect a gas leak, evacuate the premises and call emergency services. Gas leaks are hazardous and require urgent professional intervention.
  • Burst Pipes: Water damage from burst pipes can escalate rapidly. Shut off the water supply and call a plumber immediately to prevent extensive property damage.
  • Аварийные ситуации с электричеством: Искры, запахи гари или внезапные отключения электроэнергии указывают на аварийную ситуацию с электричеством. Немедленно обратитесь к электрику, чтобы избежать опасности возгорания.

As you revel in the joys of spring, don’t let plumbing problems dampen your spirits. By staying informed and taking preventive measures, you can enjoy the season worry-free. Remember, a stitch in time saves nine, especially when it comes to plumbing.

FAQs

How often should I check for leaks in faucets and pipes?

Regular checks every few months are advisable to catch leaks early and prevent water damage.

Can clogged drains lead to more severe plumbing issues?

Yes, untreated clogged drains can lead to pipe damage and more extensive plumbing problems.

Why is preventive maintenance crucial for water heaters?

Regular maintenance prevents sediment buildup, prolonging the life of your water heater and ensuring consistent hot water.

When should I seek professional help for plumbing issues?

If you’re unsure or if problems persist despite DIY efforts, it’s wise to consult a professional plumber.

Is mould always a result of plumbing problems?

While not always, undetected plumbing issues can create a conducive environment for mould growth. Regular checks help prevent this.

4 Tips For Replacing Faucets On Old Sinks

Faucets are more than just functional fixtures in our homes; they contribute to the overall aesthetic and functionality of our living spaces. If you find yourself dealing with a leaky, outdated faucet on an old sink, it might be time for a replacement. In this article, we’ll explore four tips for replacing faucets on old sinks, guiding you through the process with expert advice and practical insights.

Signs It’s Time to Replace Your Faucet

Faucets play a crucial role in our daily lives, and when they start showing signs of wear and tear, it’s essential to consider a replacement. Here are key indicators that it might be time to replace your faucet:

  • Dripping or Leaking:

One of the most obvious signs is a persistent drip or leak. Not only is this an annoying water wastage issue, but it can also lead to more severe problems like water damage.

  • Corrosion and Rust:

Inspect your faucet for any signs of corrosion or rust. These not only affect the aesthetic appeal but can also impact the quality of the water flowing through.

  • Outdated Design:

If your faucet looks like it belongs to another era, it’s probably time for an upgrade. Modern faucets not only improve functionality but also add a fresh touch to your kitchen or bathroom.

Being attentive to these signs ensures that you address faucet issues promptly, preventing further damage and maintaining the efficiency of your plumbing fixtures.

Choosing the Right Faucet Replacement

Selecting a new faucet involves more than just picking a design you like. It’s crucial to consider various factors to ensure compatibility and functionality. Here’s a guide to help you choose the right faucet replacement for your needs:

  • Matching Sink Compatibility:

Before making a decision, check the compatibility of the new faucet with your sink. Consider the number of mounting holes and their spacing to ensure a seamless fit.

  • Selecting the Right Style and Finish:

Faucets come in a myriad of styles and finishes. Choose one that complements your overall design aesthetic, whether it’s a classic chrome finish or a trendy matte black.

  • Considering Water Efficiency:

In the era of environmental consciousness, opt for a water-efficient faucet. This not only contributes to eco-friendliness but also leads to long-term cost savings on your water bill.

By paying attention to these factors, you can make an informed decision that goes beyond aesthetics, ensuring the new faucet meets your practical needs and contributes to your overall design vision.

Tools and Materials Needed

To successfully replace your faucet, it’s essential to have the right tools and materials at your disposal. Here’s a comprehensive list to ensure you’re well-prepared for the task:

1. Adjustable Wrench:

A versatile tool for loosening and tightening nuts. Choose an adjustable wrench for flexibility.

2. Pliers:

Use pliers to grip and turn objects. Channel-lock pliers are particularly useful for plumbing tasks.

3. Basin Wrench:

Specifically designed for working in tight spaces under the sink, the basin wrench is crucial for removing and installing nuts on faucets.

4. Screwdriver:

Both flat-head and Phillips-head screwdrivers may be needed for various parts of the faucet assembly.

5. Plumber’s Tape:

Also known as Teflon tape, this helps create a watertight seal when wrapping around threaded pipe connections.

6. Bucket or Towels:

Have a bucket or towels handy to catch any water that may spill during the process.

7. New Faucet:

Choose a replacement faucet that fits your sink and matches your style preferences. Ensure it comes with all necessary components.

8. Supply Lines:

Replace old, worn supply lines with new ones. Choose flexible supply lines for easier installation.

9. Plumber’s Putty:

For sealing gaps between the sink and faucet or between the sink and the new drain.

10. Plumbing Wrench:

In addition to an adjustable wrench, having a dedicated plumbing wrench can be helpful for certain connections.

11. Plunger:

Just in case you encounter any clogs while working on the plumbing.

Having these tools and materials ready ensures a smooth faucet replacement process. Before starting, double-check that you have everything on the list to avoid interruptions during the installation.

Removing the old faucet

Removing an old faucet is a crucial step in the replacement process. Follow these steps for a systematic and hassle-free removal:

Turn Off Water Supply:

Begin by turning off the water supply to the sink. Locate the shut-off valves beneath the sink and turn them clockwise until they are fully closed.

Open Faucet to Release Pressure:

Open the faucet to release any remaining water pressure. This step is essential to minimise water spillage when disconnecting the water lines.

Disconnect Water Supply Lines:

Use an adjustable wrench to loosen and disconnect the water supply lines from the faucet. Have a bucket or towels ready to catch any water that may drain from the lines.

Remove Mounting Nuts:

Locate the mounting nuts securing the faucet to the sink. Depending on the design, these may be visible or hidden beneath decorative caps. Use a basin wrench to loosen and remove these nuts.

Disconnect the Drain Stopper (if applicable):

If your sink has a pop-up drain stopper, disconnect it by removing the connecting rod. This step is necessary for complete faucet removal.

Detach Faucet from Sink:

Once the mounting nuts are removed, carefully lift the old faucet from the sink. If there is any resistance, double-check for any remaining connections and detach them.

Clean the Area:

After removing the old faucet, clean the sink area thoroughly. Remove any old plumber’s putty or silicone that may be left behind.

Inspect for Any Issues:

Take this opportunity to inspect the sink and surrounding areas for any signs of damage or corrosion. Addressing potential issues now can prevent problems with the new faucet.

By following these steps, you can efficiently remove the old faucet and prepare the sink for the installation of the new one. Remember to work patiently and systematically to avoid any damage to the sink or plumbing components.

Installing the new faucet

Now that the old faucet is removed, let’s guide you through the process of installing your new faucet. Follow these steps for a successful installation:

Prepare the New Faucet:

Unbox the new faucet and gather all the components. Check the manufacturer’s instructions for any specific details regarding your faucet model.

Carefully position the new faucet in the mounting holes on the sink. Ensure that it aligns correctly and sits flush against the sink surface.

Secure Mounting Nuts:

From beneath the sink, secure the faucet in place by tightening the mounting nuts. Use a basin wrench to ensure a snug fit. Be cautious not to overtighten, which could damage the faucet or sink.

Connect Water Supply Lines:

Connect the water supply lines to the corresponding hot and cold water inlets on the faucet. Use an adjustable wrench to tighten the connections securely.

Attach the Drain Stopper (if applicable):

If your new faucet includes a pop-up drain stopper, reattach it by connecting the lever or rod according to the manufacturer’s instructions.

Apply Plumber’s Putty (if necessary):

If your faucet requires a seal between the base and the sink, apply plumber’s putty to create a watertight seal. Follow the product instructions for the correct application.

Check for Leaks:

Turn on the water supply and test the faucet for any leaks. Inspect both the water supply connections and the base of the faucet for any signs of water leakage.

Operational Test:

Test the functionality of the faucet, including hot and cold water settings and any additional features. Ensure smooth operation and address any issues promptly.

Secure Additional Components:

If your faucet comes with additional components, such as a soap dispenser or side spray, secure and test each component according to the manufacturer’s instructions.

Clean Up:

Wipe down the faucet and surrounding area to remove any fingerprints, residue, or plumber’s putty.

By following these steps, you can successfully install your new faucet. Taking the time to secure connections and test for leaks ensures a reliable and long-lasting installation. Enjoy your upgraded faucet and the improved functionality it brings to your kitchen or bathroom!

DIY vs. Professional Installation

When it comes to replacing faucets, homeowners often face the decision between tackling the project themselves or seeking professional assistance. Here’s a guide to help you decide between DIY (Do-It-Yourself) and professional installation:

Assessing Your Own Skills (DIY):

  • Basic Plumbing Skills:
    • If you have experience with basic plumbing tasks and feel confident working with tools, a DIY installation may be within your capabilities.
  • Comfort with Instructions:
    • Assess your ability to follow step-by-step instructions. Many faucet installations come with detailed guides, and if you’re comfortable interpreting them, a DIY approach could be suitable.
  • Available Tools:
    • Ensure you have the necessary tools, including an adjustable wrench, pliers, and a basin wrench. Having the right tools is crucial for a successful DIY installation.

When to Call in a Professional:

  • Complex Installations:
    • If your new faucet requires intricate connections or modifications to your plumbing system, it may be best to enlist the expertise of a professional plumber.
  • Uncertain Plumbing Skills:
    • If you’re unsure about your plumbing skills or the complexity of the installation, calling a professional ensures that the job is done correctly, minimizing the risk of leaks or other issues.
  • Time Constraints:
    • If you have a busy schedule and limited time for a DIY project, hiring a professional can save you time and ensure a swift and efficient installation.
  • Warranty Considerations:
    • Some faucet manufacturers may require professional installation to validate the product warranty. Check the warranty terms before deciding on DIY or professional installation.

Tips for DIY Success:

  • Research and Preparation:
    • Research your specific faucet model and installation requirements thoroughly before starting the DIY process.
  • Follow Instructions:
    • Adhere closely to the manufacturer’s instructions. Skipping steps or making assumptions can lead to complications.
  • Take Your Time:
    • Rushing through the installation increases the likelihood of mistakes. Take your time to ensure every step is completed accurately.

Benefits of Professional Installation:

  • Expertise and Experience:
    • Professional plumbers have the knowledge and experience to handle various faucet installations, including challenging scenarios.
  • Guaranteed Workmanship:
    • Professional installations often come with guarantees or warranties, providing peace of mind in case any issues arise after the installation.
  • Efficiency:
    • Professionals can complete installations efficiently, minimising disruptions to your daily routine.

In summary, the decision between DIY and professional installation depends on your comfort level with plumbing tasks, the complexity of the installation, and your time constraints. While a well-prepared DIY approach can be successful, professional installation ensures a high level of expertise and comes with the added benefit of guaranteed workmanship.

Replacing faucets on old sinks doesn’t have to be a daunting task. With the right information and tools, you can upgrade your fixtures, enhance your space, and enjoy the benefits of a modern and functional faucet. Whether you choose a classic design or embrace the latest trends, the key is to make a choice that suits your style, needs, and budget.

FAQs

What tools do I need to replace a faucet?

Essential tools include an adjustable wrench, pliers, a basin wrench, and a screwdriver.

Can I replace a faucet without professional help?

Yes, if you have basic plumbing skills and the necessary tools. Follow a step-by-step guide for a successful DIY installation.

How often should I clean my faucet?

Regularly clean your faucet with a mild soap and water solution to maintain its appearance and functionality.

Are touchless faucets worth the investment?

Touchless faucets offer convenience and improved hygiene, making them a worthwhile investment for many homeowners.

Where can I find affordable faucet replacement parts?

Explore local hardware stores or online retailers for a range of affordable faucet replacement parts.

What Do I Do If My Pipes Freeze?

Winter brings many challenges, and one of the most dreaded issues for homeowners is the freezing of pipes. As temperatures drop, the risk of pipes freezing increases, leading to potential damage and inconvenience. In this article, we will explore the signs of frozen pipes, why they are a concern, and most importantly, how to address and prevent this common winter woe.

Signs of Frozen Pipes

Winter brings its own set of challenges, and one common issue homeowners face is the freezing of pipes. In this section, we’ll explore the signs that can indicate your pipes may be frozen, helping you identify and address the issue promptly.

1. Reduced Water Flow

One of the initial signs of frozen pipes is a noticeable reduction in water flow. If you turn on a faucet and only a trickle comes out, there’s a good chance your pipes are freezing.

2. Unusual Odours

Frozen pipes can produce strange odours. If you detect unusual smells when using water fixtures, it’s a signal that something may be amiss within your plumbing system.

3. Frost on Pipes

A visible layer of frost on exposed pipes is a clear sign of freezing. Inspect pipes in basements, crawl spaces, and attics for any frost accumulation.

Identifying these signs early on can help you take preventive measures and avoid the potentially damaging consequences of frozen pipes

Why Frozen Pipes Are a Concern

As winter sets in, the concern over frozen pipes becomes more prevalent. Understanding why frozen pipes are a significant issue is crucial for homeowners. In this section, we’ll delve into the reasons behind the apprehension surrounding frozen pipes.

  • Risk of Bursting

The primary concern associated with frozen pipes is the risk of them bursting. When water freezes, it expands, and this expansion exerts immense pressure on the pipe walls. The result can be a ruptured pipe, leading to water leakage and potential damage to your property.

  • Potential Damage to Property

Apart from the immediate risk of bursting, frozen pipes can cause extensive and costly damage to your property. Water damage, mould growth, and structural issues are common consequences of burst pipes. The longer the issue persists, the more severe the damage can become.

Understanding these risks underscores the importance of taking proactive measures to prevent pipes from freezing in the first place and addressing the issue promptly if it occurs. Frozen pipes should not be underestimated, as their consequences can extend far beyond the inconvenience of temporarily reduced water flow.

Preventing Frozen Pipes

As the winter chill sets in, it’s crucial to take proactive measures to prevent the freezing of pipes. Frozen pipes can lead to a cascade of issues, including the risk of bursting and potential damage to your property. In this section, we’ll explore effective ways to prevent pipes from freezing.

Insulating Pipes

A fundamental step in preventing frozen pipes is insulation. Ensure that pipes, especially those in unheated areas such as basements, attics, and crawl spaces, are adequately insulated. This helps retain heat and shields the pipes from freezing temperatures.

Allowing Faucets to Drip

During particularly cold nights, letting faucets drip slightly can prevent water from standing still in the pipes, reducing the risk of freezing. The movement of water, even at a slow drip, makes it less susceptible to freezing.

Keeping the Thermostat Consistent

Maintaining a consistent indoor temperature is vital for preventing frozen pipes. Even when you’re away, avoid significant temperature drops by keeping your thermostat at a stable level. This helps ensure that your pipes stay above freezing.

By incorporating these preventive measures into your winter routine, you can significantly reduce the likelihood of encountering the hassles and potential damages associated with frozen pipes. Stay proactive, and your pipes will thank you for it.

Using Safe Thawing Methods

Discovering frozen pipes in your home can be a stressful situation, but thawing them safely is crucial to prevent further damage. In this section, we’ll explore safe methods for thawing frozen pipes without causing harm to your plumbing system.

1. Identifying the Frozen Section

The first step in thawing frozen pipes is to identify the affected section. Check exposed pipes in unheated areas like basements, crawl spaces, and attics. Look for frost accumulation or areas where the pipe appears significantly colder than the surroundings.

2. Using Warm Towels

Applying warm towels to the frozen section is a gentle method for thawing pipes. Soak towels in warm water and wrap them around the frozen area. This gradual application of heat helps melt the ice inside the pipe.

3. Using a Hairdryer

A hair dryer can be an effective tool for thawing frozen pipes. Direct the warm air onto the frozen section, moving the dryer back and forth. Be patient and avoid using high heat, as excessive heat can damage the pipe.

4. Wrapping Pipes with Heat Tape

Heat tape is designed to provide controlled and safe heat to pipes. Wrap the heat tape around the frozen section, following the manufacturer’s instructions. This method is especially useful for preventing re-freezing.

5. Avoiding Open Flames or Excessive Heat

It’s crucial to avoid using open flames or excessive heat sources like blowtorches to thaw pipes. High temperatures can damage pipes and increase the risk of fire hazards. Stick to controlled and safe thawing methods.

Thawing frozen pipes requires patience and a cautious approach. By utilising safe thawing methods, you can effectively restore water flow without causing additional problems. If you’re unsure or uncomfortable handling the situation, don’t hesitate to seek professional assistance to ensure the safety of your plumbing system.

Professional Help for Frozen Pipes

While attempting to address frozen pipes on your own is commendable, there are situations where seeking professional help is not only advisable but essential. In this section, we’ll explore when it’s time to call in a plumber or seek expert advice to deal with frozen pipes effectively.

When to Call a Plumber

If you’re unable to thaw the frozen pipes yourself or if the situation seems more complex than initially thought, it’s time to call a professional plumber. Plumbers are equipped with the knowledge and tools to assess the severity of the issue and implement the necessary solutions.

Seeking Expert Advice

In some cases, even if you can manage the immediate thawing process, seeking expert advice is prudent. A plumbing professional can provide insights into the root cause of the freezing, offer preventive measures, and ensure that your plumbing system is in good condition.

Dealing with frozen pipes is not just about resolving the immediate issue but also preventing future occurrences. Plumbers have the expertise to identify underlying problems and recommend long-term solutions that can save you from repeated episodes of frozen pipes.

DIY Solutions vs. Professional Assistance

While there are DIY solutions for thawing pipes, it’s crucial to assess the situation realistically. If the frozen pipes are extensive, if there’s a risk of bursting, or if you’re unsure about the appropriate measures, calling a plumber is the safest course of action.

Attempting complex plumbing tasks without the necessary expertise can lead to further damage and potentially higher repair costs. Professional plumbers bring experience and efficiency to the table, ensuring that the issue is addressed comprehensively.

In summary, when faced with frozen pipes that go beyond your comfort level or DIY capabilities, don’t hesitate to reach out to a qualified plumber. Timely professional assistance can not only resolve the immediate problem but also prevent future plumbing issues, providing you with peace of mind during the winter months.

In conclusion, addressing frozen pipes requires a combination of preventive measures, timely identification, and, if necessary, professional assistance. By staying vigilant and taking proactive steps, homeowners can protect their properties from the potentially disastrous effects of frozen pipes.

FAQs

Can frozen pipes be prevented entirely?

While it’s challenging to eliminate the risk entirely, preventive measures significantly reduce the likelihood of pipes freezing. Insulating pipes, allowing faucets to drip, and maintaining a consistent indoor temperature are effective preventive steps.

How do I know if my pipes are frozen or just blocked?

Reduced water flow and frost on pipes are strong indicators of frozen pipes. If you experience these signs, especially during cold weather, it’s essential to take action promptly to thaw the pipes and prevent potential bursting.

Are there specific areas in the house more prone to frozen pipes?

Yes, areas with poor insulation, such as basements, crawl spaces, and attics, are more prone to frozen pipes. Additionally, pipes located near exterior walls or in unheated areas are at higher risk.

Can I use an open flame to thaw frozen pipes?

No, using an open flame is highly discouraged. It poses a risk of fire and can damage the pipes. Stick to safe thawing methods, such as warm towels, a hairdryer, or heat tape, to avoid potential hazards.

What should I do if a pipe bursts due to freezing?

In the event of a burst pipe, immediately shut off the main water supply to your home to minimise water damage. Contact a plumber promptly to assess and repair the damaged pipe. Thoroughly document the damage for insurance claims.

How To Keep Your Drains Clean All Year Round

Maintaining clean drains is a crucial aspect of home care that often gets overlooked. In this article, we will delve into the ins and outs of effective drain maintenance, debunk common myths, and provide practical tips to ensure your drains stay clear throughout the year.

Debunking Common Drain Myths

Maintaining a smoothly running plumbing system is essential for any household. However, the internet is rife with misinformation about drain care. 

Myth 1: Pouring Hot Water Will Solve Everything

Contrary to popular belief, hot water alone cannot tackle all drain issues. While it helps in preventing clogs, it might not be sufficient for more significant problems like grease buildup.

Myth 2: Lemons Keep Drains Fresh

While lemons can impart a pleasant scent, they won’t effectively clean your drains. In fact, citrus peels can contribute to clogs over time.

How Everyday Habits Impact Your Drains

Your daily activities have a direct impact on the health of your drains. From the remnants of cooking oil to hair in the shower, small habits add up. Being mindful of what goes down the drain can significantly reduce the risk of blockages.

The health of your drains is often influenced by the daily habits you may not even think twice about. 

  • Habit 1: Pouring Grease Down the Drain

One common but detrimental habit is pouring grease down the drain after cooking. While it may seem convenient, grease can solidify in the pipes, leading to clogs and potential damage. Instead, collect grease in a container and dispose of it in the trash.

  • Habit 2: Neglecting Hair in the Shower

Allowing hair to accumulate in the shower drain is a common oversight. Over time, this can lead to stubborn clogs. Use drain screens to catch hair and regularly clean them to prevent shower drain issues.

  • Habit 3: Flushing Non-Flushable Items

Flushing non-flushable items, such as wipes and hygiene products, can cause blockages in the sewer system. Always dispose of these items in the trash to avoid costly plumbing problems.

  • Habit 4: Overusing Chemical Drain Cleaners

While chemical drain cleaners can be effective, using them excessively can harm pipes and the environment. Consider alternative methods like baking soda and vinegar for regular drain maintenance.

The Do’s and Don’ts of Drain Usage

Maintaining your drains in good condition is crucial for a well-functioning plumbing system. Do: Use Sink Strainers

One simple yet effective practice is using sink strainers. These small devices help prevent debris, food scraps, and small objects from entering the drain, reducing the risk of clogs. Invest in quality sink strainers for all your sinks to maintain a clear flow.

Don’t: Pour Grease Down the Drain

One of the most common mistakes is pouring grease down the drain. Over time, grease can solidify and lead to stubborn clogs. Instead, let grease cool and dispose of it in the trash or a designated grease disposal container.

Do: Dispose of Food Scraps Properly

Proper disposal of food scraps is essential for kitchen drain health. Use compost or trash bins for food waste to avoid clogging your kitchen sink. This simple practice contributes to a cleaner and more efficient drainage system.

Don’t: Flush Non-Flushable Items

Certain items, like wipes and hygiene products, should never be flushed down the toilet. Dispose of non-flushable items in the trash to prevent blockages in your sewer system and potential plumbing issues.

Do: Perform Regular Drain Maintenance

Routine drain care is a proactive approach to prevent issues. Implement simple practices, such as flushing drains with hot water, using enzymatic cleaners, and periodically inspecting for potential problems.

Don’t: Overuse Chemical Drain Cleaners

While chemical drain cleaners can be effective, overuse can lead to pipe damage and harm the environment. Consider alternatives like baking soda and vinegar for regular drain maintenance without the risks associated with harsh chemicals.

Do: Install Hair Catchers in Showers

Hair accumulation in shower drains is a common problem. Install hair catchers to prevent strands from entering the drain, reducing the likelihood of shower drain clogs. Regularly clean and maintain these catchers for optimal effectiveness.

Don’t: Allow Long Hair Strands in Drains

Neglecting long hair strands in drains can result in clogs. Be proactive in managing and preventing hair accumulation by using hair catchers and regularly cleaning them to maintain clear drains.

Choosing Drain-Friendly Products

Maintaining the health of your drains involves more than just good habits; it also requires choosing products that are friendly to your plumbing system. Understanding Drain-Friendly Products

Drain-friendly products are those specifically designed not to harm or negatively impact your plumbing system. These products are formulated to be gentle on pipes, avoiding corrosive materials that could lead to clogs or damage over time. Choosing such items is crucial for the long-term well-being of your drains.

1. Drain-Friendly Cleaning Products

When it comes to cleaning, opting for eco-friendly and non-corrosive cleaners is essential. Chemical drain cleaners can be harsh on pipes and harmful to the environment. Consider alternatives such as baking soda and vinegar or commercially available non-corrosive drain cleaners to maintain your drains effectively.

2. Choosing Gentle Soaps for Sinks and Showers

The soaps you use in sinks and showers can impact your drains. Harsh soaps may leave residues that accumulate in pipes, leading to clogs over time. Choose drain-friendly soaps, typically labelled as such, or opt for liquid soaps that are known to be gentler on drains.

3. Using Enzymatic Cleaners for Regular Maintenance

Enzymatic cleaners are designed to break down organic matter, making them an excellent choice for regular drain maintenance. These cleaners are not only effective in preventing clogs but also contribute to the overall health of your drains. Incorporate enzymatic cleaners into your routine to keep your drains clear and odor-free.

4. Opting for Biodegradable and Eco-Friendly Items

Non-biodegradable items can contribute to clogs and harm the environment. Choose biodegradable alternatives whenever possible. Look for products made from sustainable materials that won’t leave a lasting impact on the ecosystem.

5. Avoiding Harsh Chemicals in Personal Care Products

Personal care products, such as shampoos and shower gels, can contain harsh chemicals that affect drain health. Select products with drain-friendly ingredients, and avoid those with excessive chemicals that may contribute to clogs.

DIY Drain Maintenance

Maintaining the health of your drains doesn’t always require professional help. DIY drain maintenance is a proactive and cost-effective way to prevent clogs and keep your plumbing system running smoothly.

  • DIY Drain Maintenance Tools

Before delving into specific solutions, it’s essential to have the right tools for the job. Basic tools like plungers and drain snakes are invaluable for dislodging minor clogs. These DIY-friendly options can be easily found at your local hardware store and are a must-have for routine drain care.

  • Baking Soda and Vinegar Drain Cleaner

One of the most popular and effective DIY drain cleaners involves the use of baking soda and vinegar. This natural solution not only clears minor clogs but also helps eliminate odors. To use this DIY cleaner, start by pouring a cup of baking soda down the drain, followed by a cup of vinegar. Allow the mixture to sit for about 15 minutes before flushing it with hot water. The fizzing action helps break down debris, leaving you with a clear and fresh-smelling drain.

  • DIY Enzymatic Drain Cleaner

For ongoing maintenance, consider creating your own enzymatic drain cleaner. Combine a cup of baking soda, a cup of salt, and a quarter-cup of cream of tartar. Mix the dry ingredients thoroughly and store the mixture in a sealed container. To use, pour a tablespoon of the mixture down the drain, followed by hot water. The enzymes in this DIY solution help break down organic matter, preventing clogs and promoting drain health.

  • Homemade Citrus Drain Freshener

If you prefer a natural and pleasant-smelling freshener, turn to citrus fruits. Cut up citrus peels, such as those from lemons or oranges, and place them in the drain. Follow this with a generous pour of hot water. Not only does this DIY solution leave your drain smelling citrus-fresh, but the acidity also helps break down grease and residue.

Warning Signals: Recognizing Early Signs of Drain Issues

Early detection is key to preventing extensive damage. Look out for slow drainage, gurgling sounds, or unpleasant odours. Addressing these issues promptly can save you from more significant problems in the future.Your home’s plumbing system is a crucial aspect of daily life, and recognizing early signs of drain issues can save you from more significant problems down the line. 

Slow Drainage

One of the earliest and most noticeable warning signals is slow drainage. If you find water taking longer than usual to drain from sinks, showers, or tubs, it could indicate a developing issue. Ignoring slow drainage may lead to more severe clogs, causing potential damage to your plumbing system over time.

Unpleasant Odours

Unpleasant odours emanating from drains are another warning sign of potential issues. Foul smells may indicate the presence of accumulated debris, organic matter, or even sewer gas. Identifying specific odours, such as a sewage smell, can help pinpoint the source of the problem and address it before it escalates.

When to Seek Professional Help for Drain Problems

While DIY solutions work in many cases, there are times when professional intervention is necessary. If you notice persistent issues or if DIY efforts prove ineffective, it’s time to call in the experts.

In conclusion, keeping your drains clean is a manageable task with the right knowledge and habits. By understanding the do’s and don’ts, recognizing warning signals, and knowing when to seek professional help, you can ensure your drains remain clog-free throughout the year.

FAQs

How often should I clean my drains?

Regular maintenance is recommended, at least once a month, to prevent clogs and other issues.

Can I use chemical drain cleaners?

It’s best to avoid harsh chemicals as they can damage pipes. Opt for natural solutions like baking soda and vinegar.

Why is my drain still slow after DIY cleaning?

Persistent slow drains may indicate a more significant issue. Consult a professional plumber for a thorough inspection.

Are there any eco-friendly drain cleaning options?

Yes, many eco-friendly products are available that are gentle on your drains and the environment.

Can I use a plunger to clear my drains?

Plungers can be effective for minor clogs. However, exercise caution and consider professional help for stubborn blockages.

Everything You Need To Know About Power Flushing

Power flushing, a term often heard in the context of central heating systems, is a crucial maintenance process that ensures optimal performance and longevity. In this comprehensive guide, we’ll delve into the intricacies of power flushing, exploring its definition, benefits, and how it contributes to the efficiency of central heating systems.

Maintaining a cosy and warm home relies heavily on a well-functioning central heating system. Over time, these systems can accumulate sludge, rust, and debris, diminishing their effectiveness. This is where power flushing comes into play, acting as a restorative procedure to enhance the performance of your central heating.

What is Power Flushing?

Power flushing is a methodical process designed to remove built-up contaminants from central heating systems. These contaminants, including sludge and rust, can impede the flow of water and reduce the efficiency of the heating system. Power flushing addresses these issues, restoring optimal functionality.

How Does Power Flushing Work?

The process involves connecting a specialised machine to the central heating system. This machine circulates a cleaning solution at high velocity, dislodging and flushing out any debris or sludge present. The entire system is thoroughly cleaned, promoting better water circulation and heat distribution.

Benefits of Power Flushing

Investing in power flushing offers a range of benefits. Firstly, it significantly improves heating efficiency, ensuring that your home stays warm during the colder months. Additionally, a clean central heating system translates to reduced energy bills, as the system operates more efficiently. Moreover, power flushing contributes to the prolonged lifespan of your heating system.

  • Improved Heating Efficiency:
    • One of the primary advantages of power flushing is the substantial improvement in heating efficiency. By clearing out accumulated sludge and debris, the system can distribute heat more effectively, ensuring a consistently warm and comfortable home.
  • Reduced Energy Bills:
    • A clean central heating system operates more efficiently, leading to reduced energy consumption. When radiators and pipes are free from blockages, the boiler doesn’t have to work as hard to provide the desired warmth, ultimately lowering your energy bills.
  • Prolonged Lifespan of Central Heating Systems:
    • Regular power flushing contributes to the longevity of your central heating system. By preventing the build-up of corrosive elements and debris, you reduce the risk of internal damage, extending the lifespan of vital components like the boiler and radiators.
  • Faster Heating Response:
    • Power flushing ensures that heat can quickly and evenly circulate through the system. This means your home warms up faster, providing a more responsive heating experience, especially crucial during colder months.
  • Quieter Operation:
    • Accumulated sludge and debris can create annoying noises within the central heating system. Power flushing eliminates these obstructions, resulting in a quieter operation. Say goodbye to clanging or gurgling sounds that may have become a regular occurrence.
  • Consistent Radiator Performance:
    • Over time, radiators can develop cold spots due to blockages. Power flushing eliminates these cold spots, ensuring that each radiator in your home performs consistently, providing an even distribution of heat.
  • Improved Hot Water Flow:
    • If your central heating system is also responsible for providing hot water, power flushing can enhance the flow of hot water. This improvement is particularly noticeable in homes where both heating and hot water are supplied by the same system.
  • Enhanced System Reliability:
    • A power-flushed system is more reliable, reducing the likelihood of breakdowns. Regular maintenance through power flushing minimises the risk of system failures, providing peace of mind, especially during the winter when a functioning heating system is crucial.
  • Optimised Energy Efficiency Rating:
    • Power flushing contributes to achieving and maintaining the optimal energy efficiency rating for your central heating system. This is not only beneficial for your pocket but also aligns with environmental sustainability goals by reducing overall energy consumption.
  • Prevention of Boiler Noise and Vibrations:
    • Boiler noise and vibrations are often caused by the presence of sludge and debris. Power flushing removes these contaminants, preventing the annoying sounds and vibrations that can accompany an inefficient system.

When Should You Consider Power Flushing?

Recognizing when your central heating system needs power flushing is crucial. If you notice cold spots on radiators, strange noises, or if the system takes longer to warm up, it’s time to consider power flushing. Regular maintenance can also prevent these issues from arising.

DIY vs. Professional Power Flushing

While some may attempt a DIY power flush, it’s essential to weigh the pros and cons. Professional services come with expertise and specialised equipment, reducing the risk of damage to the system. DIY attempts may lead to complications and, in some cases, worsen the existing issues.

Choosing the Right Professional Service

Selecting the right professional for power flushing is paramount. Consider factors such as experience, customer reviews, and the equipment used. Asking questions about the process and expected outcomes helps ensure you choose a reputable service provider.

Selecting the right professional service for power flushing your central heating system is a crucial step toward ensuring the effectiveness and longevity of your heating setup. Here’s a guide on how to make an informed decision:

  • Experience Matters:
    • Look for a service provider with ample experience in power flushing. A company or technician with a proven track record is more likely to deliver efficient and effective results.
  • Customer Reviews and Testimonials:
    • Check online reviews and testimonials from previous customers. Positive feedback and satisfied customers are indicators of a reliable and trustworthy service. Be wary of providers with consistently negative reviews.
  • Certifications and Qualifications:
    • Ensure that the professionals you choose are certified and qualified to perform power flushing. This guarantees a certain level of expertise and adherence to industry standards.
  • Equipment and Technology:
    • Inquire about the equipment and technology the service provider uses. Advanced and specialised tools contribute to a more thorough and effective power flushing process. A reputable service invests in the latest technology to deliver optimal results.
  • Transparent Pricing:
    • Request a detailed breakdown of the pricing structure. A reliable service provider is transparent about costs, including any additional fees or charges. This transparency helps you avoid unexpected expenses.
  • Insurance Coverage:
    • Check whether the service provider has insurance coverage. Insurance protects you and your property in case of any unforeseen incidents or damages during the power flushing process.
  • Local Recommendations:
    • Seek recommendations from friends, family, or neighbours who have recently had their central heating systems power flushed. Local insights can provide valuable information about reputable services in your area.
  • Response Time and Availability:
    • Consider the service provider’s response time and availability. A company that can promptly schedule and complete the power flushing process is beneficial, especially if you’re dealing with urgent issues in your heating system.
  • Guarantees and Warranties:
    • Inquire about any guarantees or warranties offered by the service provider. A confident and reputable company stands by its work and provides assurances that you’ll be satisfied with the results.
  • References and Portfolios:
    • Ask for references or portfolios showcasing their previous power flushing projects. This allows you to assess the scale and diversity of their experience, providing further assurance of their capabilities.

Common Misconceptions about Power Flushing

There are common myths surrounding power flushing, such as it being unnecessary or detrimental to the system. Addressing these misconceptions is crucial for understanding the actual benefits and ensuring informed decisions about central heating maintenance.

Preventative Measures to Avoid Power Flushing

Regular maintenance is key to preventing the need for power flushing. Simple practices like bleeding radiators, using inhibitors, and scheduling professional check-ups contribute to a healthier central heating system.

Environmental Impact of Power Flushing

Concerns about environmental impact are valid. However, advancements in technology have led to more eco-friendly alternatives for power flushing, minimising the environmental footprint of the process.

Future Trends in Power Flushing Technology

As technology advances, so does the efficiency of power flushing. Innovations in the industry promise even more effective ways to maintain and improve central heating systems, providing homeowners with better options for system longevity.

Comparing Power Flushing to Other Maintenance Methods

Understanding how power flushing compares to alternative maintenance methods helps homeowners make informed decisions. Examining the advantages and disadvantages reveals why power flushing stands out as a reliable and efficient solution.

In conclusion, power flushing is a crucial aspect of maintaining a healthy central heating system. Regular attention to the cleanliness and efficiency of your system ensures a warm and comfortable home, reduces energy costs, and prolongs the lifespan of your heating equipment. Don’t wait for issues to arise—consider power flushing as a proactive measure to keep your central heating system in optimal condition.

FAQs

How often should I power flush my central heating system?

The frequency depends on factors like system age and usage. Generally, every 5-10 years is recommended.

Can I perform a power flush myself?

While it’s possible, professional services are advised for expertise and specialised equipment.

Is power flushing environmentally friendly?

Newer technologies offer more eco-friendly options, minimising environmental impact.

Are there signs my central heating system needs power flushing?

Cold spots on radiators, strange noises, and slow heating are indicators.

What happens if I ignore the need for power flushing?

Ignoring the need for power flushing can lead to reduced efficiency, higher energy bills, and potential damage to the heating system.

Hard Water: A Threat to Your Plumbing System

Hard water is not just a term; it’s a challenge many households face, often unknowingly. It refers to water with high mineral content, mainly calcium and magnesium. This seemingly harmless issue can wreak havoc on your plumbing system, leading to various complications that could be both expensive and inconvenient.

Effects of Hard Water on Plumbing Systems

Hard water, rich in minerals like calcium and magnesium, might seem harmless at first glance, but its impact on your plumbing system can be substantial. Understanding these effects is crucial for homeowners seeking to protect their investment in a well-functioning home.

  • Scale Buildup

One of the most common and noticeable effects of hard water on plumbing systems is the buildup of limescale. As hard water flows through pipes, it leaves behind deposits of minerals. Over time, these deposits accumulate and form a stubborn, chalky substance known as limescale. This buildup can constrict water flow, leading to reduced water pressure and efficiency in your plumbing.

  • Preventing Scale Buildup

To mitigate scale buildup, homeowners often turn to water softeners. These devices work by removing or altering the minerals responsible for limescale formation, ensuring a smoother flow through pipes.

  • Reduced Efficiency of Appliances

Hard water’s adverse effects extend beyond pipes. Appliances that rely on water, such as dishwashers and water heaters, can experience diminished efficiency due to mineral deposits. Heating elements in these appliances can become coated with limescale, requiring more energy to function and potentially leading to premature failure.

  • Appliance Maintenance

Regular maintenance, including descaling appliances, is essential to counteract the impact of hard water. This can involve using descaling agents or vinegar to dissolve mineral deposits.

Identifying Hard Water

Identifying whether your home has hard water is a crucial first step in addressing potential plumbing issues. Hard water contains elevated levels of minerals, primarily calcium and magnesium, which can have several noticeable effects. Here are practical methods to help you determine if you’re dealing with hard water.

DIY Tests

One simple way to gauge water hardness is the soap and water test. Take a clear bottle with a lid and fill it one-third with water. Add a few drops of liquid soap and shake vigorously. If the water becomes cloudy and the soap doesn’t lather easily, it’s an indication of hard water. Soft water allows soap to lather more readily.

Hard water leaves behind mineral deposits, often visible as spots on glassware, shower doors, or faucets. If you frequently notice stubborn spots that are challenging to remove, your water may be hard.

Professional Water Analysis

While DIY tests offer initial insights, a professional water analysis provides a more accurate and comprehensive assessment of your water’s mineral content.

  • Local Water Testing Services

Contact local water testing services or environmental agencies that offer water analysis. They can provide detailed reports on the levels of various minerals in your water.

  • Water Softness Measurement

Water hardness is commonly measured in grains per gallon (gpg) or parts per million (ppm). A professional analysis will provide specific measurements, helping you understand the severity of your hard water situation.

Consequences of Ignoring Hard Water Issues

Ignoring hard water issues can lead to unforeseen consequences, including the need for costly repairs and a shortened lifespan for your appliances.

Costly Repairs

Scale buildup in pipes and appliances may lead to plumbing emergencies, necessitating expensive repairs that could have been avoided.

Shortened Appliance Lifespan

Appliances like water heaters and dishwashers working in hard water conditions are prone to a shorter lifespan due to increased wear and tear.

Water Softening Solutions

Now that you’ve identified the presence of hard water in your home, it’s time to explore effective solutions to counter its adverse effects on your plumbing system and appliances. Water softening is a proven method to tackle the challenges posed by hard water

  • Water Softeners: How They Work

Water softeners use ion exchange to replace calcium and magnesium ions with sodium or potassium ions, preventing scale buildup.

  • Types of Water Softeners

From salt-based to salt-free systems, various water softeners cater to different needs. Choosing the right one depends on your water hardness level and preferences.

  • Installation Process

Professional installation ensures optimal performance. Understanding the installation process helps homeowners make informed decisions.

DIY Tips for Managing Hard Water

While professional water softening solutions are effective, there are also practical do-it-yourself (DIY) tips to help manage the impact of hard water in your home. These DIY methods can complement water softening systems and contribute to maintaining a healthy plumbing system. Let’s explore some simple yet effective tips for managing hard water.

  • Vinegar Cleaning

Regularly cleaning faucets and appliances with vinegar can help dissolve mineral deposits and mitigate the effects of hard water.

  • Using Citrus-Based Cleaners

Citrus-based cleaners are effective in breaking down limescale, providing a natural alternative for maintaining a clean plumbing system.

  • Regular Appliance Maintenance

Implementing a routine maintenance schedule for appliances helps prevent excessive wear and tear caused by hard water.

Benefits of Addressing Hard Water Problems

Addressing hard water issues in your home goes beyond the prevention of visible stains and scale buildup. The positive impacts of managing hard water extend to various aspects of your daily life and the overall well-being of your plumbing system. Let’s explore the compelling benefits of taking proactive measures to tackle hard water problems.

  • Improved Appliance Performance

Softened water improves appliance efficiency, reducing energy consumption and the need for repairs.

  • Extended Plumbing System Lifespan

Addressing hard water issues can contribute to the longevity of your plumbing system, saving you money in the long run.

Community Initiatives and Regulations

As awareness of the impact of hard water on plumbing systems grows, communities are increasingly taking proactive measures to address water quality issues. From setting water quality standards to implementing local water treatment programs, these initiatives aim to ensure the well-being of residents and the sustainability of water resources. Let’s delve into the community-driven efforts and regulations in place to combat hard water problems.

  • Water Quality Standards

Understanding local water quality standards helps homeowners advocate for cleaner water and promotes community awareness.

  • Local Water Treatment Programs

Municipalities often have water treatment programs. Being aware of and participating in such initiatives contributes to community well-being.

Future Trends in Water Treatment

The landscape of water treatment is evolving, driven by technological advancements and a growing emphasis on sustainability. As we look ahead, several trends are shaping the future of water treatment, offering innovative solutions to combat hard water and other water quality challenges. Let’s explore the emerging trends that are likely to influence the way we approach water treatment in the coming years.

  1. Technological Advancements

Smart Water Softeners

The integration of smart technology into water softeners allows for more precise and efficient water treatment. Smart systems can analyse real-time water quality data, adjusting the softening process based on the specific needs of the water supply.

Advanced Filtration Systems

Technological breakthroughs in filtration systems are enhancing their effectiveness in removing impurities, including minerals causing water hardness. These advancements contribute to more comprehensive water treatment solutions.

  1. Sustainable Innovations

Energy-Efficient Water Softeners

The focus on sustainability is driving the development of energy-efficient water softeners. These systems aim to reduce energy consumption during the softening process, aligning with global efforts to minimise environmental impact.

Biodegradable Water Softening Agents

Innovations in water softening agents are exploring biodegradable alternatives to traditional salts. This sustainable approach ensures that the byproducts of water softening are environmentally friendly and easily absorbed by nature.

  1. Decentralised Water Treatment Systems

Point-of-Use Water Softeners

Decentralised water treatment systems, such as point-of-use water softeners, are gaining popularity. These systems can be installed at specific outlets, providing targeted treatment where it’s needed most, optimising efficiency and resource use.

Individualised Water Treatment

Advancements in personalised water treatment solutions allow homeowners to tailor their water softening strategies based on specific water quality parameters, providing a more customised approach to combating hard water.

In conclusion, hard water poses a significant threat to your plumbing system. From scale buildup to reduced appliance efficiency, the consequences can be severe. However, by identifying and addressing hard water issues promptly, homeowners can enjoy improved appliance performance, an extended plumbing system lifespan, and contribute to environmental sustainability.

FAQs

Can hard water cause health issues?

While hard water isn’t harmful to health, its effects on plumbing and appliances can have indirect consequences on your well-being.

What is the lifespan of a water softener?

The lifespan of a water softener varies but is generally around 10 to 20 years, depending on usage and maintenance.

Are there natural ways to soften water?

Yes, using citric acid or vinegar can help soften water to some extent, but a dedicated water softener is more effective.

Why You Should Never Snake a Main Drain

Plumbing issues can be a homeowner’s nightmare, and a clogged main drain is undoubtedly one of the most inconvenient problems to deal with. Many individuals, in an attempt to save money or time, resort to DIY methods like snaking the main drain. The Perils of Main Drain Snaking: Understanding Plumbing Risks

Main drain issues can be a homeowner’s nightmare, and while it might be tempting to tackle the problem yourself, there are potential perils associated with main drain snaking. Understanding these risks is crucial to preventing further damage and ensuring a safe and effective resolution.

Common Mistakes in DIY Drain Clearing

One of the most common mistakes in DIY drain clearing is the improper use of drain snakes. Using the wrong type or size of snake can lead to pipe damage or worsen the clog. Additionally, overzealous attempts to clear a blockage may push it further down the line, causing more extensive issues.

Dealing with a clogged drain is a common household challenge, prompting many individuals to explore do-it-yourself (DIY) solutions. While the intent is admirable, there are common mistakes that DIY enthusiasts often make when attempting to clear drains. 

Misuse of Chemical Drain Cleaners

One prevalent mistake is the indiscriminate use of chemical drain cleaners. While these products claim to dissolve clogs, they can also harm your pipes, leading to corrosion and potential leaks. Moreover, the harsh chemicals pose health risks to those handling them.

Over Reliance on Plungers

While plungers are a handy tool for minor clogs, overusing them or applying excessive force can lead to damage. It’s essential to understand the level of force required for different types of clogs and when it’s time to seek professional assistance.

Ignoring the Underlying Issue

A common oversight is treating the symptoms rather than addressing the root cause of the clog. DIY methods might provide temporary relief, but without identifying and resolving the underlying problem, the issue is likely to recur.

Using Inappropriate Tools

DIY drain clearing often involves makeshift tools that may not be suitable for the task. Improvised wire hangers or sharp objects can scratch and damage pipes, exacerbating the problem. Opting for professional-grade tools is a safer choice.

Lack of Protective Gear

Engaging in DIY drain clearing without proper protective gear is a safety hazard. Chemical exposure, splashes, or accidental contact with debris can lead to injuries. Wearing gloves and safety glasses is crucial when working with drain-cleaning chemicals or tools.

Incomplete Removal of Blockages

Sometimes, DIY efforts result in partially clearing a clog, leaving debris that can contribute to future blockages. It’s vital to ensure a thorough removal of blockages to prevent recurring issues.

 Disregarding Ventilation Concerns

DIY drain clearing may involve the release of unpleasant odours or harmful fumes. Ignoring ventilation considerations can lead to exposure to noxious substances. Proper airflow is crucial when using chemicals or dealing with sewer gas.

 Failure to Test Drain Functionality

After attempting to clear a drain, it’s important to test its functionality. Neglecting this step may lead to overlooking persistent issues or incomplete clearing of the clog.

 Underestimating the Severity of the Clog

DIY enthusiasts may underestimate the severity of a clog, leading to inadequate measures. Recognizing when a clog requires professional attention is crucial to prevent further damage.

 Improper Disposal of Debris

After successfully clearing a drain, the disposal of debris is often an afterthought. Improper disposal can lead to environmental issues and even contribute to future blockages.

Professional Insights on Drain Maintenance

Professional plumbers emphasise the importance of regular drain maintenance. Scheduled inspections and preventative measures can identify potential problems before they escalate. Neglecting routine maintenance may result in costly repairs and disruptions to your daily life.

Choosing Safe Alternatives for Drain Issues

While chemical drain cleaners are widely available, they pose risks to both your pipes and your health. Opting for environmentally friendly and non-corrosive alternatives can be safer and more sustainable in the long run. Consult with plumbing professionals for advice on safe and effective alternatives.

Preventing Plumbing Emergencies

Prevention is key to avoiding plumbing emergencies. Installing drain screens, being mindful of what goes down the drain, and addressing minor issues promptly can prevent major disruptions. Regularly monitoring water pressure and drainage speed can also help detect potential problems early on.

Plumbing emergencies can strike at the most inconvenient times, causing stress, inconvenience, and potential damage to your home. The good news is that many plumbing emergencies can be prevented with proactive measures and regular maintenance.

Regular Inspection of Plumbing Fixtures

A crucial step in preventing plumbing emergencies is conducting regular inspections of your plumbing fixtures. Check for leaks, drips, or any signs of water damage around sinks, faucets, and toilets. Timely identification and repair of minor issues can prevent them from escalating into major problems.

Proper Disposal Practices

One common cause of plumbing emergencies is the improper disposal of household items. Avoid flushing non-flushable items, such as wipes, sanitary products, and paper towels, down the toilet. Additionally, refrain from pouring grease down the kitchen sink, as it can solidify and cause clogs.

Installation of Drain Screens

Installing drain screens is a simple yet effective way to prevent debris from entering your drains. Hair, soap scum, and other particles can accumulate over time, leading to clogs. Drain screens act as a barrier, reducing the risk of blockages and the need for emergency interventions.

Temperature Regulation in Cold Weather

In colder climates, frozen pipes are a common cause of plumbing emergencies. To prevent this, insulate exposed pipes and allow faucets to drip during freezing temperatures. The movement of water can help prevent pipes from freezing and bursting.

Regular Water Heater Maintenance

Water heaters play a crucial role in a functioning household. To prevent emergencies, schedule regular maintenance for your water heater. Flushing the tank, checking for leaks, and ensuring proper pressure can extend the lifespan of your water heater and reduce the risk of sudden malfunctions.

Signs Your Main Drain Needs Attention

Recognizing the signs of main drain issues is crucial. Slow drainage, gurgling sounds, and foul odours are indicators that your main drain may be compromised. Ignoring these signs could lead to more severe problems, such as sewage backups and structural damage.

Expert Advice: What Not to Do with Main Drains

Plumbing experts advise against using excessive force or harsh chemicals when attempting to clear a main drain. These actions can cause irreversible damage and result in costly repairs. Instead, seek professional guidance to ensure a safe and effective resolution.

Proactive Measures for Healthy Plumbing

Taking proactive measures for healthy plumbing involves adopting good habits. Avoid flushing non-biodegradable items, such as wipes and sanitary products, down the toilet. Proper disposal of grease and regular inspection of plumbing fixtures can contribute to a smoothly functioning system.

Safe and Effective Drain Clearing Techniques

When faced with a clogged main drain, it’s essential to employ safe and effective clearing techniques. Auger or hydro-jetting methods, when used correctly, can clear blockages without causing harm to your pipes. Consulting with a professional plumber ensures the right approach for your specific situation.

In conclusion, maintaining a healthy main drain requires a combination of proactive measures, regular inspections, and the use of safe and effective clearing techniques. Understanding the risks associated with DIY attempts and seeking professional advice when needed can save you time, money, and the headache of a plumbing emergency.

FAQs

What are the risks of DIY main drain snaking?

DIY snaking carries the risk of unintentional pipe damage and may not effectively address severe blockages.

How often should I schedule professional drain cleaning?

It’s advisable to schedule professional drain cleaning annually to prevent issues and maintain a healthy plumbing system.

Can I use homemade solutions for drain cleaning?

While some homemade solutions may work for minor issues, professional assistance is recommended for more significant problems.

Are chemical drain cleaners safe for pipes?

Chemical drain cleaners can damage pipes and pose health risks. Professional plumbers offer safer alternatives.

What signs indicate a main drain issue?

Slow drainage, gurgling sounds, and foul odours are common signs of main drain issues that warrant professional attention.

How Long Does Basement Waterproofing Last?

Basement waterproofing is a crucial investment in maintaining the structural integrity of your home. Ensuring its longevity is equally important. Let’s delve into the factors affecting the lifespan of basement waterproofing, methods to choose from, and whether opting for professional services or a DIY approach makes a difference.

Basement waterproofing isn’t a one-size-fits-all solution. The lifespan of your waterproofing efforts depends on various factors, making it essential to understand and address them.

Factors Affecting Basement Waterproofing Last

Basement waterproofing is a crucial investment for homeowners looking to protect their property from water damage. The effectiveness and longevity of basement waterproofing are influenced by various factors that need careful consideration. Let’s explore these factors to better understand how they impact the lasting protection of your basement.

  • Climate and Weather Conditions

The environment plays a pivotal role in how long your basement waterproofing will last. Extreme weather conditions can expedite wear and tear, emphasising the need for weather-appropriate materials and techniques.

  • Quality of Materials Used

The durability of waterproofing largely depends on the quality of materials employed. Cutting corners here might save you money initially but could result in premature failure down the line.

  • Proper Installation Techniques

Even with top-notch materials, improper installation can compromise the effectiveness of basement waterproofing. Professional installation ensures that every detail is attended to, maximising the lifespan of your investment.

Choosing the Right Waterproofing Method

With various waterproofing methods available, choosing the right one is critical. Each method has its advantages and drawbacks, influencing how long your basement remains protected.

When it comes to basement waterproofing, selecting the appropriate method is crucial for ensuring the long-lasting protection of your property. There are various methods available, each with its advantages and drawbacks. Let’s delve into the options to help you make an informed decision based on your specific needs and circumstances.

Overview of Available Methods

  1. Interior Waterproofing
  • Description: This method involves addressing water-related issues from the inside of the basement. It includes the installation of drainage systems and sump pumps.
  • Pros: Effective for managing water that has already entered the basement. Typically less disruptive to the landscape.
  • Cons: Does not prevent water from penetrating the foundation.
  1. Exterior Waterproofing
  • Description: Focuses on preventing water from entering the basement by applying waterproof coatings and installing drainage systems on the outside of the foundation.
  • Pros: Provides a barrier against water intrusion. Addresses issues at the source.
  • Cons: Can be more invasive and expensive. Requires excavation around the foundation.
  1. Cavity Drain Membrane Systems
  • Description: Involves the installation of a membrane on the interior walls to manage and redirect water to a drainage system.
  • Pros: Allows for continuous monitoring and maintenance. Provides a controlled drainage path.
  • Cons: Relies on the effectiveness of the drainage system.
  1. Crystalline Waterproofing
  • Description: Application of crystalline substances to concrete surfaces, creating a barrier against water penetration.
  • Pros: Becomes an integral part of the concrete structure. Durable and resistant to wear.
  • Cons: Application can be challenging. Effectiveness may vary based on the concrete quality.

Pros and Cons of Each Method

Pros

  • Interior waterproofing is effective for managing existing water issues.
  • Exterior waterproofing prevents water intrusion at the source.
  • Cavity drain membrane systems provide continuous monitoring and controlled drainage.
  • Crystalline waterproofing becomes a lasting part of the structure.

Cons

  • Interior waterproofing does not stop water from entering the foundation.
  • Exterior waterproofing can be invasive and costly.
  • Cavity drain membrane systems rely on the efficiency of the drainage system.
  • Crystalline waterproofing applications may pose challenges.

Choosing the right waterproofing method depends on factors such as the severity of water issues, budget constraints, and personal preferences. Consulting with a waterproofing professional can provide valuable insights tailored to your specific situation, ensuring that you make a decision that aligns with your long-term protection goals.

Professional vs. DIY Waterproofing: Which Lasts Longer?

While the DIY approach may be tempting, professional waterproofing often guarantees longer-lasting results. We’ll weigh the pros and cons, helping you make an informed decision.

When it comes to basement waterproofing, homeowners often face the dilemma of choosing between professional services and a do-it-yourself (DIY) approach. Both options have their merits, but the longevity of the waterproofing solution is a critical consideration. Let’s explore the advantages and drawbacks of each to help you make an informed decision on what will provide lasting protection for your basement.

basement waterproofing last

Advantages of Professional Waterproofing

  1. Expertise and Experience
  • Professional Touch: Waterproofing professionals bring a wealth of knowledge and experience to the table. They are trained to assess unique challenges and implement effective solutions.
  • Proper Diagnosis: Professionals can accurately diagnose the root cause of water issues, ensuring that the waterproofing strategy is targeted and comprehensive.
  1. Quality Materials and Techniques
  • Top-notch Materials: Professionals use high-quality waterproofing materials that are designed for durability. This contributes significantly to the longevity of the waterproofing system.
  • Proven Techniques: Professional waterproofing involves tried-and-tested techniques that are known for their effectiveness. This ensures a robust and lasting solution.
  1. Comprehensive Solutions
  • Customised Approach: Professionals tailor their waterproofing solutions to the specific needs of your basement. This personalised approach addresses individual challenges, maximising the effectiveness of the waterproofing.
  1. Warranty and Guarantee
  • Peace of Mind: Many professional waterproofing services come with warranties or guarantees. This provides homeowners with peace of mind, knowing that they can rely on the effectiveness of the solution.

Risks and Benefits of DIY Waterproofing

  1. Cost Savings
  • Budget-Friendly: DIY waterproofing projects can be more budget-friendly upfront. Homeowners can save on labour costs by taking on the project themselves.
  1. Hands-On Experience
  • Learning Opportunity: DIY waterproofing allows homeowners to learn more about their homes and gain hands-on experience. It can be a rewarding process for those who enjoy tackling home improvement projects.
  1. Risk of Mistakes
  • Lack of Expertise: DIY projects carry the risk of mistakes due to a lack of professional expertise. Incorrect installation or material choices can lead to a shorter lifespan for the waterproofing system.
  • Limited Tools and Resources: Homeowners may not have access to the specialised tools and resources that professionals use, potentially affecting the quality of the waterproofing.
  1. Time and Effort
  • Time-Consuming: DIY waterproofing projects can be time-consuming. The learning curve and the need to research and plan can extend the time it takes to complete the project.

Making the Decision

Choosing between professional and DIY waterproofing depends on factors such as budget, the complexity of the issue, and personal skills. While DIY projects offer a sense of accomplishment and potential cost savings, professional services provide expertise, quality assurance, and long-term reliability. For homeowners prioritising the lasting protection of their basement, consulting with a waterproofing professional is often the best route to ensure a solution that stands the test of time.

Signs Your Basement Waterproofing Needs Attention

Basement waterproofing is an essential aspect of home maintenance, but over time, even the most reliable systems can show signs of wear and tear. Recognizing these signs early can save you from costly repairs and potential damage to your property. Here are key indicators that your basement waterproofing may need attention:

  1. Damp or Musty Odours
  • Sign: Unpleasant smells in your basement.
  • Cause: Accumulation of moisture leading to mould and mildew growth.
  • Action: Investigate and address the source of the moisture promptly.
  1. Visible Mould or Mildew
  • Sign: Spots or patches of mould on walls, floors, or belongings.
  • Cause: Excess humidity or water intrusion.
  • Action: Clean and remove mould, then identify and fix the water source.
  1. Puddles or Water Stains
  • Sign: Standing water or noticeable water stains on walls or floors.
  • Cause: Leaks or seepage through the foundation.
  • Action: Locate and repair the source of the water entry.
  1. Efflorescence
  • Sign: White, chalky residue on basement walls.
  • Cause: Water moving through concrete, depositing minerals.
  • Action: Waterproof exterior walls and manage interior moisture.
  1. Cracks in Foundation
  • Sign: Visible cracks in the foundation walls or floor.
  • Cause: Structural shifts or pressure from water.
  • Action: Assess and repair foundation cracks promptly.

Comparing Waterproofing Materials for Durability

Selecting the right materials for your basement waterproofing is crucial for ensuring longevity. Here’s a comparison of common waterproofing materials:

  1. Polyurethane Sealants
  • Durability: High
  • Pros: Flexible, effective for sealing cracks.
  • Cons: Can deteriorate over time with UV exposure.
  1. Cementitious Waterproofing
  • Durability: Moderate
  • Pros: Adheres well to masonry surfaces.
  • Cons: Not suitable for active leaks, can crack.
  1. Bituminous Coatings
  • Durability: Moderate to High
  • Pros: Effective barrier against water.
  • Cons: Can become brittle and crack.
  1. Elastomeric Membranes
  • Durability: High
  • Pros: Flexible, resistant to UV exposure.
  • Cons: Initial cost may be higher.

Maintenance Tips for Prolonging Waterproofing Lifespan

Preserving the effectiveness of your basement waterproofing requires regular maintenance. Follow these tips to prolong the lifespan of your waterproofing system:

  1. Gutter Maintenance
  • Action: Keep gutters clean and ensure proper drainage away from the foundation.
  1. Landscaping Considerations
  • Action: Slope the landscape away from the house to prevent water pooling around the foundation.
  1. Regular Inspections
  • Action: Periodically inspect walls and floors for signs of leaks or damage.
  1. Sealant Checks
  • Action: Check and refresh sealants as needed, especially in high-traffic areas.

Real-life Examples: How Long Did Their Waterproofing Last?

Explore real-life examples of successful basement waterproofing endeavours. These case studies offer valuable insights into different scenarios and highlight the effectiveness of various waterproofing methods. Learn from the experiences of homeowners who have successfully protected their basements from water damage.

Common Mistakes Leading to Premature Waterproofing Failure

Avoidable errors during installation and maintenance can significantly impact the lifespan of your basement waterproofing. Learn from common mistakes that homeowners make, and discover how to steer clear of pitfalls that could lead to premature failure of your waterproofing system.

Budgeting for Long-Term Basement Waterproofing Success

Effective waterproofing requires careful budgeting. Plan your budget thoughtfully, considering both short-term costs and long-term benefits. Explore cost-effective strategies for ensuring the success and longevity of your basement waterproofing.

Expert Advice: Ensuring Lasting Protection for Your Basement

Benefit from the insights of waterproofing experts. Discover valuable tips and advice on ensuring lasting protection for your basement. Stay informed about the latest trends and innovations in basement waterproofing to make informed decisions about the well-being of your home.

FAQs

What is the average lifespan of basement waterproofing?

The lifespan varies but, with proper maintenance, can extend for several years.

Can I waterproof my basement myself?

While possible, professional services often ensure more reliable and longer-lasting results.

How often should I inspect my basement for waterproofing issues?

Regular inspections, at least annually, can catch issues early, preventing costly repairs.

Effects of Chemical Drain Cleaning on Your Plumbing System

Chemical drain cleaners have become a popular choice for homeowners dealing with clogged drains. These powerful agents offer a quick and seemingly easy solution to clear blockages, but understanding their impact on your plumbing system is crucial for maintaining its long-term health.

Chemical Drain Cleaners on Your Plumbing System

When faced with a stubborn clog, it’s tempting to reach for a chemical drain cleaner for its quick results. These cleaners typically work by breaking down organic matter, but their effectiveness comes with consequences. The chemicals can be harsh on pipes and fixtures, potentially causing long-term damage.

Potential Risks to Your Plumbing System

While chemical drain cleaners offer a speedy remedy, their corrosive nature poses risks to your plumbing system. Pipes can deteriorate over time with frequent use, leading to leaks and other structural issues. It’s essential to weigh the convenience against the potential risks before choosing this method.

Benefits of Using Chemical Drain Cleaning Agents

Despite the risks, chemical drain cleaners have their merits. They are cost-effective compared to hiring professional plumbing services, and their accessibility makes them a convenient option for minor plumbing issues. Understanding when and how to use these cleaners responsibly is key to reaping their benefits.

drain cleaners safe for pipes

The use of chemical drain cleaning agents comes with several benefits, making them a popular choice for homeowners dealing with plumbing issues. Understanding these advantages can help you decide whether to incorporate them into your maintenance routine. Let’s delve into the benefits of using chemical drain cleaning agents:

  • Cost-Effective Solutions:
    • Chemical drain cleaners are generally more affordable than hiring professional plumbing services. For minor clogs and routine maintenance, these products offer a budget-friendly alternative.
  • Accessibility and Ease of Use:
    • One of the major advantages of chemical drain cleaners is their accessibility. These products are readily available at hardware stores, supermarkets, and online, making them convenient for quick fixes. Additionally, they are easy to use, requiring minimal effort and expertise.
  • Quick Results:
    • Chemical drain cleaners are known for their fast-acting properties. They can swiftly dissolve organic matter and clear clogs, providing immediate relief from plumbing issues. This quick turnaround can be especially beneficial in emergencies.
  • Versatility for Minor Issues:
    • For minor clogs and routine maintenance, chemical drain cleaners can be highly effective. They are versatile and can tackle various types of blockages, ranging from hair and soap scum to food particles.
  • Preventive Maintenance:
    • Regular use of chemical drain cleaners can serve as a preventive measure. By breaking down potential clog-forming substances, these agents help maintain smooth drainage, reducing the likelihood of more severe plumbing problems in the future.
  • Convenience for Homeowners:
    • Homeowners appreciate the convenience of having a solution readily available for unexpected clogs. The ease of use and quick results make chemical drain cleaners a go-to option for those who prefer tackling minor plumbing issues independently.
  • Availability of Different Formulations:
    • Chemical drain cleaners come in various formulations to cater to different needs. Some are designed for specific types of clogs, while others focus on preventing future blockages. This diversity allows homeowners to choose a product tailored to their requirements.
  • Reduced Dependency on Professional Services:
    • While professional plumbing services are crucial for complex issues, chemical drain cleaners provide a level of self-sufficiency for homeowners. They empower individuals to address minor plumbing issues without immediately resorting to external help.
  • No Need for Specialized Tools:
    • Unlike some plumbing tasks that may require specialised tools, using chemical drain cleaners typically only involves pouring the product into the affected drain. This simplicity eliminates the need for extensive equipment or professional skills.
  • Contribution to Water Conservation:
    • By quickly resolving clogs, chemical drain cleaners can contribute to water conservation. Swiftly addressing plumbing issues prevents wasteful water usage associated with slow drainage and overflow.

While chemical drain cleaners offer these benefits, it’s essential to use them responsibly and be aware of potential risks. Understanding the dos and don’ts, as well as considering eco-friendly alternatives, ensures that you make informed decisions when maintaining your plumbing system.

Drain Cleaners Safe for Pipes: Dos and Don’ts

If you decide to use chemical drain cleaners, it’s crucial to choose products specifically formulated to be safe for pipes. Always follow the recommended dosage and application instructions to prevent damage. Additionally, take precautions such as wearing protective gear and ensuring proper ventilation when using these chemicals.

Environmental Considerations in Drain Cleaning

The environmental impact of chemical drain cleaners is a growing concern. Many of these products contain harsh chemicals that can harm aquatic life and soil quality. Eco-conscious homeowners may want to explore alternative, environmentally friendly options to minimise their ecological footprint.

Signs Your Plumbing System Needs Attention

Recognizing signs of potential plumbing issues is vital for proactive maintenance. Slow drainage, foul odours, and unusual sounds can indicate underlying problems. Regular inspections and prompt attention to these signs can prevent more significant issues down the line.

Alternatives to Chemical Drain Cleaners Safe For Pipes

For those wary of the potential risks associated with chemical drain cleaners, several safe alternatives exist. Natural remedies, such as baking soda and vinegar, can effectively clear minor clogs. Non-chemical methods, like using a plunger or drain snake, offer mechanical solutions without the use of harsh chemicals.

drain cleaner safe for pipes

DIY Tips for Maintaining Healthy Pipes

Maintaining a healthy plumbing system goes beyond addressing clogs. Regular inspections, cleaning routines, and proper waste disposal habits contribute to the overall well-being of your pipes. Simple DIY tasks, such as periodically flushing drains with hot water, can prevent the accumulation of debris.

Professional Plumbing Insights

While DIY efforts are commendable, there are instances where professional intervention is necessary. Plumbing experts have the knowledge and tools to diagnose and address complex issues. Knowing when to seek professional help can save you time, money, and potential damage to your plumbing infrastructure. 

When it comes to plumbing issues, seeking professional plumbing insights is often a wise decision. While DIY efforts can address minor problems, certain situations require the expertise of a trained plumber. Here are key insights from professionals in the plumbing industry:

Early Intervention is Key

Plumbing professionals emphasise the importance of early intervention. Addressing plumbing issues promptly can prevent minor problems from escalating into major, costly repairs. Regular inspections and timely repairs contribute to the longevity of your plumbing system.

DIY Limitations

Professionals acknowledge that some plumbing tasks are suitable for DIY enthusiasts. However, they caution against attempting complex repairs without the necessary knowledge and experience. Knowing when to seek professional help can save you time, money, and potential damage to your plumbing infrastructure.

Correct Diagnosis Saves Time and Money

Professional plumbers emphasise the significance of accurate diagnosis. Identifying the root cause of a plumbing issue allows for targeted repairs, saving both time and money. Guesswork or incomplete assessments can lead to ineffective solutions and recurring problems.

Use of Specialized Equipment

Plumbing professionals are equipped with specialised tools that go beyond the capabilities of typical household tools. These tools enable accurate diagnostics and efficient repairs, especially in cases involving hidden leaks or clogs deep within the plumbing system.

chemical drain cleaning on your plumbing system

Compliance with Building Codes

Professional plumbers are well-versed in local building codes and regulations. When undertaking plumbing repairs or installations, they ensure compliance with these codes. This is crucial not only for the functionality of the plumbing system but also for legal and safety considerations.

Preventive Maintenance Recommendations

Plumbers often provide valuable insights into preventive maintenance. They may recommend regular tasks, such as drain cleaning, pipe inspections, and water heater maintenance, to proactively address potential issues before they become emergencies.

Efficient Problem-Solving

Experienced plumbers possess a wealth of knowledge gained from handling diverse plumbing challenges. This expertise allows them to efficiently troubleshoot and solve problems, providing effective and lasting solutions.

Quality Materials and Workmanship

Professional plumbers prioritise the use of high-quality materials in their repairs and installations. This commitment to quality ensures the longevity and durability of the plumbing work, reducing the likelihood of future issues.

Emergency Services

Plumbing emergencies can occur at any time. Professional plumbers often offer emergency services to address urgent issues promptly. Having a reliable professional to turn to in emergencies provides peace of mind for homeowners.

Educating Homeowners

Plumbers often take the time to educate homeowners on proper plumbing care. This includes providing tips on preventive measures, identifying signs of potential issues, and offering guidance on the safe use of plumbing fixtures and appliances.

In conclusion, while DIY efforts can be effective for certain plumbing tasks, consulting professional plumbers is essential for more complex issues. Their insights, combined with specialised skills and equipment, contribute to the overall health and efficiency of your plumbing system. Remember that a proactive approach, including regular professional assessments, is key to maintaining a robust plumbing infrastructure in your home.

Long-term Strategies for a Robust Plumbing System

To ensure a robust plumbing system in the long run, consider upgrading and modernising your plumbing infrastructure. Investing in durable pipes, fixtures, and appliances can prevent issues before they arise. Implementing preventive measures, such as regular inspections and maintenance, is key to extending the lifespan of your plumbing system.

In conclusion, while chemical drain cleaners offer a quick fix for clogs, it’s essential to weigh the benefits against the potential risks to your plumbing system. Responsible use, consideration of eco-friendly alternatives, and a combination of DIY maintenance and professional insights contribute to a healthy and robust plumbing system.

FAQs

Are chemical drain cleaners safe for all types of pipes?

It depends on the specific product. Some are formulated to be safe for various pipe materials, while others may cause damage.

How often should I perform DIY maintenance on my plumbing system?

Regular maintenance, such as flushing drains with hot water and inspecting for signs of issues, is recommended every few months.

Can natural remedies effectively clear stubborn clogs?

Yes, natural remedies like baking soda and vinegar can be effective for minor clogs.